
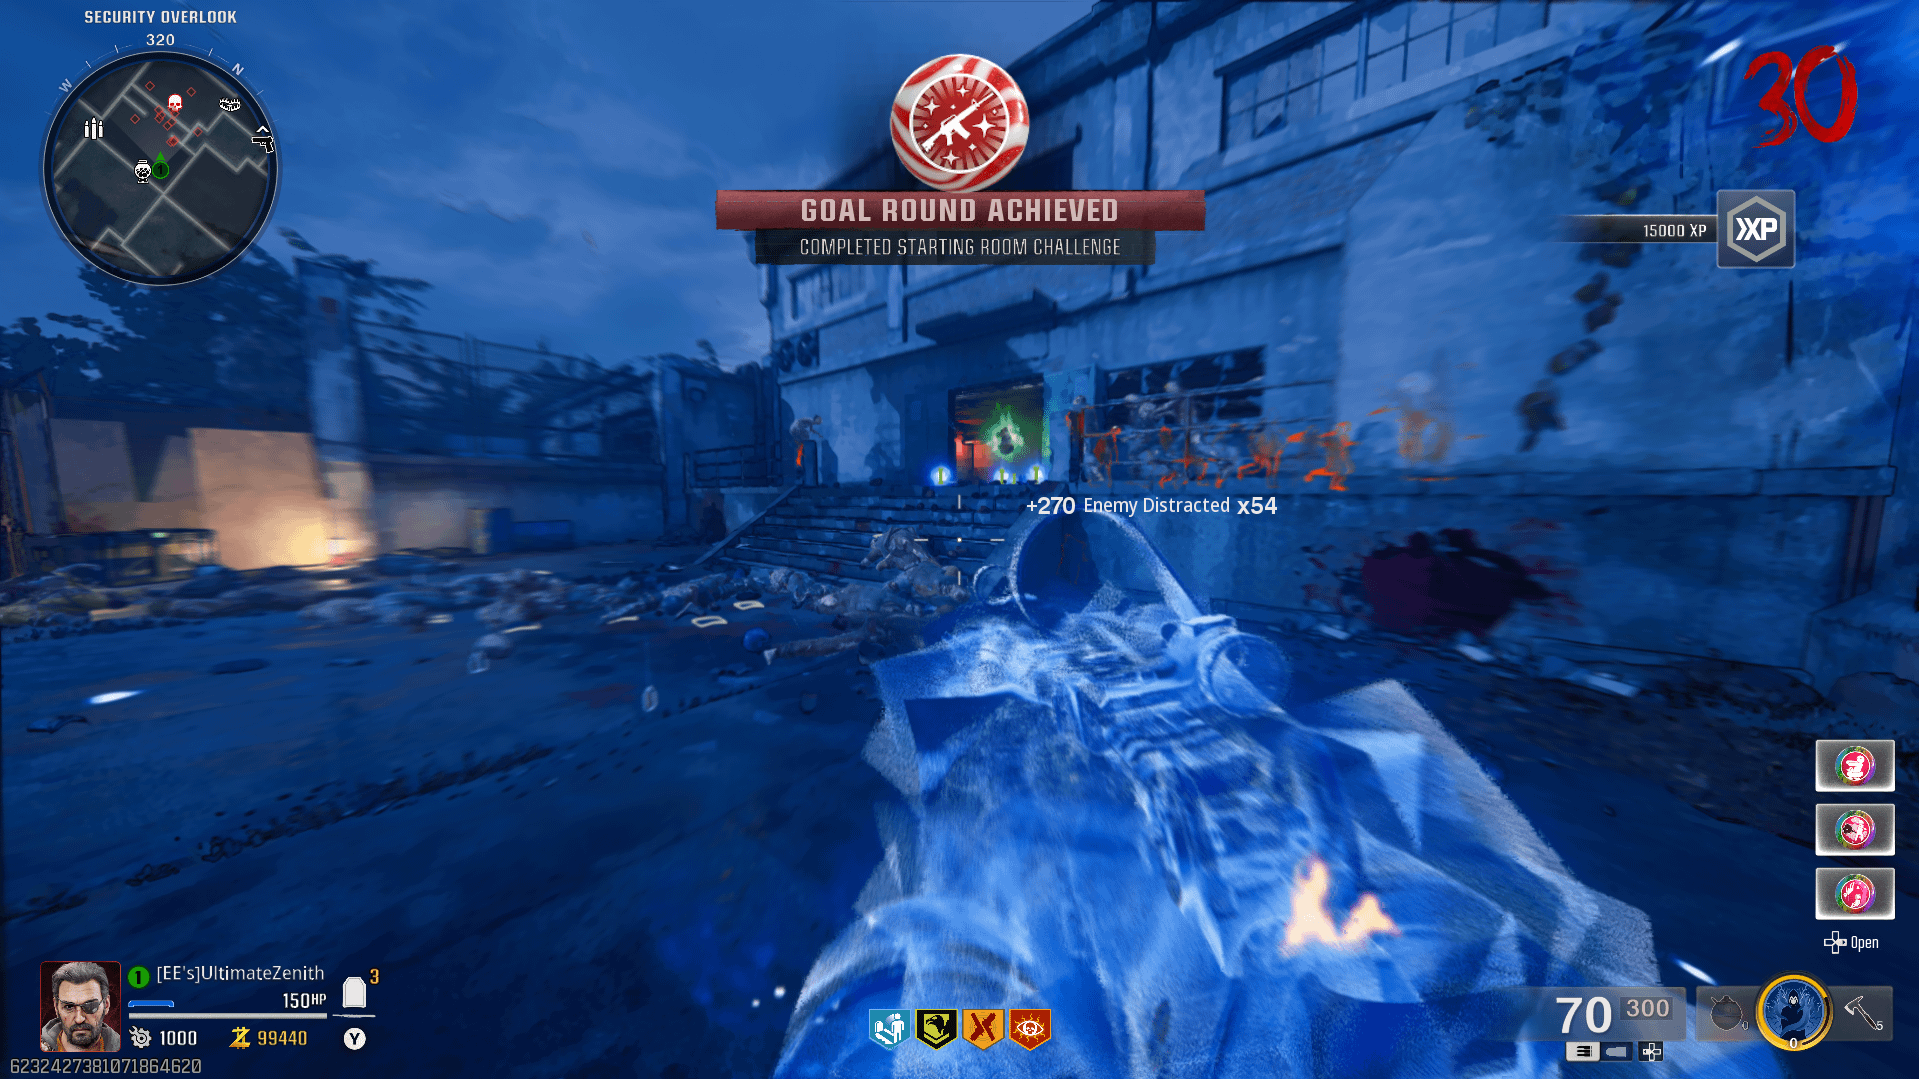
I just completed the Terminus First Room Challenge solo without using Gobblegums and without Juggernog, so I thought I'd leave some tips. Feel free to ask any questions and I will do my best to answer them.
Loadout – The most important piece of the loadout is having an AR with the Drill Charge equipped. This is key because two drill charge shots can kill a Mangler, and does good damage against the Amalgams as well. I ran Decoys, though Shock Charges probably aren't a bad idea either. I found Tomahawks to be the best equipment, as they insta-kill zombies and you will have a never-ending supply of them as long as you don't throw them out of the map. Aether Shroud was also useful, as you will more likely than not get trapped at some point or come close to death
Perks – In this run, I got Vulture Aid, Double Tap, Death Perception, Speed Cola, and Quick Revive. Quick Revive would've been nice earlier, but I didn't get it until Round 29 when I was using a Mangler Injection, so it had no effect on the run and it can be completed without it. I also only had Speed Cola for a few rounds, as I got it in the early 20's but lost it when I downed on Round 27 when I got a bit greedy. Of these, Vulture Aid probably ended up being the most useful as it helped replenish Decoys, but it's not a run-ender if you don't get it
Scorestreaks – To be honest, I find this to be the real RNG of the run, and not the perks. While keeping in mind that you can't get scorestreaks if you kill an Elite or Special with a scorestreak, you can certainly damage it down to the end before finishing it off by other means to try and drop it. The biggest thing to do here is to shuffle scorestreaks if you can–while you can obviously only hold one at a time, if you replace one scorestreak with another, and then swap again, you reset the despawn timer so that you can essentially keep multiple scorestreaks through many rounds. I ended up getting one Mangler Injection that I kept for Round 29, and shuffled it with a couple others through then. You really only want to use them on Amalgams, since Manglers can be two-shot with the drill charges, and if you don't have one, I recommend training through the trap since they can't pass through it and slowly get damaged by it.
Training Strategy – I spent most of my time after the mid teens training outside by the Ammo Crate, running clockwise and jumping onto the stairs. It's important to stick to the edges and not get too far ahead of the horde so that you give yourself as much maneuverability as possible. Whenever I had to go into the initial spawn area with a full horde, I stuck to the Rampage Inducer wall, did a quick double-back towards the GS45, then back to the Rampage Inducer, and once more back to GS45 and was able to get completely around the horde and back to the Ammo Crate area.
Tip #1 – Patience. Patience is the name of the game for this challenge. While getting a train going is important, being able to maintain it is even more so. While it might be tempting to kill as quickly as you can, that can result in zombies spawning in at bad times and killing you, so it is highly advised to only kill a couple of zombies at a time. This also helps with managing the mid-round Mangler spawns once you get into the high 20's, as it is much easier to deal with them when you have it separated from the rest of the horde.
Tip #2 – Points Maximization. It may not seem like it, but you want to get as many points as possible to help increase the drops you get. If you're not already familiar with it, powerups are part of a "drop cycle", where you get each powerup once before the cycle resets and randomizes, and you do it again. There is a minimum threshold required for a powerup to spawn, though there is a small chance (about ~3% in previous games, not sure if it's the same here) for a powerup to spawn randomly. This is important because I believe that the Random Perk powerup is part of this cycle, so the more points the get, the more drops you get, and the more likely you'll get a free perk.
Tip #3 – Trap Usage. I only used the trap a few times throughout my run, which ties into Tip #1. Though it may seem nice to get those instant kills, the amount of respawns it generates can kill you if you're not able to get up a train quickly enough. For that reason, I only ended up using the trap to deal with a couple Manglers that messed up my training and for dealing with one of the Amalgams. Also important is that it would be wise to wait to progress a round until the trap has recharged, so that you always have it at the start of a round if you need it.
Tip #4 – Aether Shroud. Because of the nature of this challenge, it's always helpful to have as many get-out-of-jail-free cards as possible, so for that reason I ran the Aether Shroud augment that gives you two charges. To that end, I'm also 99% sure that Tomahawk kills don't recharge your meter, so I ended up just trying to fill it by killing zombies normally, even if it resulted in very slow rounds in the high 20's.
5 Comments
I died today again twice on round 19/20 as not one streak dropped from a mangler. How many runs have you done to get this rng?
does drill charge damage change based on how upgraded your gun is ?
Super ez tbh! Done it with and without gums. More fun with gums ofc, just use the trap and enjoy the rng boys! Go 4 people more fun
Was it 30 or round 40? I know some maps are different than others no?
What do the other maps have that terminus doesnt?