
Ah, the Araksaka deck. Depending on who you talk to, it's the most OP deck ever, or complete trash. Or maybe the playstyle just doesn't make sense to you. After many hours of using this deck from as early on in the game that I can purchase it, all the way up to endgame, I've learned some tricks on how to really take advantage of this deck. There are other guides out there, and many of them are quite good, but I'm making this guide in large part because the tricks I discovered weren't ones I was able to find anywhere else. If you find another reference, let me know!
Deck Overview
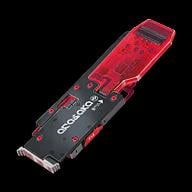
So what does the Arasaka Shadow deck actually do? The base stats are identical to the Militech Paraline you start with and is one of three options, including the Paraline, available at tier 1 (with the last being the Rippler). This makes it tied for the lowest capacity cost at 14 cyberware capacity but otherwise unremarkable. At tier 1 it's identical to the Paraline.
Tier 2+ is where the unique aspects of this deck start to take shape. Unlike every other deck in the game, this deck has no damage bonuses of any kind. The closest equivalent is the Netwatch Netdriver, an iconic tier 5 deck, but even that has a damage and duration bonus for hacks uploaded through cameras.
Instead, the deck gives you the best stealth effects of any other deck and it's not close. At tier 2, you get a -40% traceability bonus, which stacks with encryption's -30% for 70% longer trace times. In practice, this makes the trace bar go up very slowly on its own, although more hacking will speed this up by adding flat trace value.
The tier 3 ability is simple but extremely powerful. It's a flat -2 RAM cost to all covert quickhacks. Covert hacks include Ping, Bait, Request Backup, Memory Wipe, and Sonic Shock. Every single one of these are good when used right. Note that a quickhack can never have RAM cost reduced below 2, which means that iconic Sonic Shock (which costs 2 RAM) doesn't get this reduction, and tier 2 Bait and Request Backup go from 3 cost to 2.
The tier 4 ability is mostly forgettable, giving you 5 RAM after performing a Takedown. Takedowns are stealth grabs and generally take some time to set up. There is one scenario where it's handy, but for the most part you'll end takedowns with full RAM anyway.
Finally, the tier 5 ability prevents trace from increasing due to hacks while Overclock is active. Like most tier 5 abilities, it's situational and usually ignorable. But if you are chaining effects on everyone it's not bad.
There are two more upgrades: at tier 5+ the trace time improves to -60% and at 5++ it improves to -100%. These make your already long trace time become nearly unlimited.
Early Game (Tier 1-2)
So how do you use this deck early game? Bait. The answer is Bait.
It's a bit tedious, but you can use Bait to draw enemies over for takedowns, and this is your most reliable way to take out enemies in the early game, at least on Very Hard difficulty (all this was played on Very Hard). On easier difficulties you can probably just use damage quickhacks and still win; Overheat is your best option at low levels.
Learning to use Bait takes a bit of practice. The basic technique after upload is to stay around a corner that you can also find another hiding place from. They'll walk towards you a certain distance, look around, get bored, and start walking back. When they turn, immediately upload Bait again. Make sure you are close enough to reach them during stealth in a few seconds.
The second Bait will cause them to stop walking for about 2-3 seconds, then turn around and come back towards you. You can either chain these to move someone far away to a secluded area or prevent them from moving for a moment while you sneak up and grab them. You can hold someone for quite a while before they break free and move while holding them, so it's worth it to walk them where you want their body to go first rather than picking it up off the floor. Rinse, repeat until you've thinned down the encounter enough to win.
You can also just use things like Reboot Optics or Weapon Glitch and shoot people. The early game is not heavy on netrunning power, regardless of deck. But if you want to commit to stealth, this is the method that worked for me. Request Backup is another option, but frankly I found it a lot less reliable than Bait.
Explosives and using objects for distraction also work really well. There were plenty of times I'd use distraction to move one enemy away from some vulnerable, take them down, then rush over to the distracted guy and take him down next. Blowing people up and running them over with cars is endlessly entertaining as well, and when combined with Bait you can split groups up this way. I had more fun trying to puzzle out how to manage these fights than I expected and still utilize these tactics sometimes for the fun of it in the late game.
Mid Game (Tier 3-4)
Tier 3 is where the power of this deck starts to become clear. Keep in mind you don't have to be the full level where tier 3 stuff drops or sells to have a tier 3 deck; you can upgrade it earlier. Upgrading your deck is your highest early game priority.
The reason for this is simple: Memory Wipe. Memory Wipe lacks a tier 1 or 2 version, but you can use the tier 3 and 4 versions for the rest of the game, and will probably never take them off your deck (tier 5 is basically useless though). Normally, both versions are fairly expensive at 8 and 10 RAM respectively, but with the Arasaka deck at tier 3, they cost 6 and 8 for you, which is very affordable with decent RAM regeneration cyberware.
With tier 3 Memory Wipe, you suddenly have a new tool to make your life much, much easier. Remember the Bait combo above? Now it's trivial. T3 Memory Wipe has two effects…it reduces current trace progress by 25% (more on this later), which is mostly useless right now, and prevents the enemy from noticing you. This is the key effect.
Remember when you had to wait for the enemy to walk over with Bait, turn around, then do all that jazz to knock them out? No longer. Now when they stop, hit them with Memory Wipe, walk casually around them (even standing up if you are out of line of sight and far enough away), and snap their neck. The "unnoticed" effect doesn't last forever, but it's an eternity compared to the second Bait pause, and you don't have to time it anymore. This dramatically increases your speed of knocking people out.
Oh, and that tier 4 deck ability to get RAM back on takedowns? Yeah, this combo is basically free. More importantly, tier 4 Memory Wipe opens up the options to use combat quickhacks without entering trace. The 8 RAM isn't cheap, but if you are patient you can take out anyone eventually from pure stealth at range. I usually combined with 2x Cyberware Malfunction followed by an Overheat. True hacking stealth becomes viable with tier 4, and you only really need T4 Memory Wipe, Cyberware Malfunction, and Overheat.
Late Game (Tier 5+)
We're finally at tier 5, and this is where the deck gets silly, because of one hack we haven't mentioned yet: Sonic Shock. From T2-T4, Sonic Shock is fairly weak. Stealth is pretty easy and you'll want 15 Cool for ninja run anyway. Having enemies ignore them is nice but you can also just Bait them away. No, it's the Tier 5 ability that makes this deck absurd.
Basically, if you upload Sonic Shock to an enemy already affected by Memory Wipe and Reboot Optics, it causes them to shut down. This is essentially the same effect as System Collapse. For most decks, the price isn't super worth it. A T4 Memory Wipe + T2 Reboot Optics (we use T2 because it only costs 2 RAM) + T5 Sonic Shock is 18 RAM. System Collapse is 28 RAM, so you do save 10 RAM, but System Collapse can be made cheaper when you reduce trace by 12 RAM twice, and even one instance (which can be triggered with takedowns if you have Shadowrunner) brings the ultimate quickhack cost below the combo (16 RAM, then 4 RAM with 2 stacks).
With the Arasaka deck, however, you get -4 RAM for the combo since both Memory Wipe and Sonic Shock are covert, making the instant kill combo a mere 14 RAM. And once you get the Iconic version of Sonic Shock it goes down to 12. The popular 3x Cyberware Malfunction plus Synapse Burnout is 19 RAM for the first use and drops to 14 with repeated stacks. It's also not a guaranteed kill until much later in the game on Very Hard. Oh, and the Sonic Shock combo is completely stealthy…no trace is started and you can do it next to friends and they won't even notice the body immediately due to the Sonic Shock effect.
Tier 3 Memory Wipe Combo
Up until now, you can find most of this information elsewhere. Maybe not the way to use Bait, but it's not hard to learn. The trick I found, that I haven't seen elsewhere, is to use T3 Memory Wipe for the Sonic Shock combo instead of the T4 version.
Why? Two reasons. The first is that it's cheaper, duh. It becomes 12/10 RAM instead of 14/12. That's nice, but now you initiate traces, so isn't that bad?
Well…no. Because you are using the Arasaka deck, traces are incredibly slow. And since you have Sonic Shock, you can prevent any of your hacks from increasing trace when queued later, plus the Overclock effect does this as well, so you get the full time. Still, you're on a timer rather than not on one.
The trick is the second effect of Memory Wipe…reducing current trace by 25%. Since your trace is so slow, as long as you are using T3 Memory Wipe for your combo, you'll repeatedly reset your trace timer back a quarter every time you use it. In practice, unless you go make a sandwich, this means you have an unlimited trace timer, and you get to save 2 RAM on your instant death combo. No problem!
It gets better, however, when you remember System Collapse. System Collapse costs 28 RAM, and gets -12 up to two times whenever you reduce trace. Which Memory Wipe does. Oh, and the T5 System Collapse does again. See the pattern?
Basically, you take out two enemies with the full Memory Wipe combo. The first one starts the trace with Reboot Optics but you'll keep resetting your timer as you take people out. This costs 20 or 24 RAM. Now System Collapse costs 4 RAM on the next target, so you take out 3 enemies with 24 or 26 RAM without activating combat. Bonus points if you use Copy-Paste to System Collapse the netrunner tracing you and take out the whole group. Even if you don't, System Collapse reduces trace again by 20 or 40%, reducing its cost, so now you can take out two enemies at a time for 14 RAM total by alternating them, and you'll be resetting the trace timer to zero the whole time.
There are times when you have a lot of spread out enemies and don't want to initiate a trace; no problem. Swap out the T3 Memory Wipe for the T4 version and you won't start traces at all again. It's slower, as you can't use System Collapse and need to spend more RAM, but you have more time because there's no timer at all.
What Else?
That's all you really need, but you still have 4 more slots for other quickhacks. Personally, I like having Ping, as it's very convenient and the Iconic version is only 2 RAM. It synergizes well with my "loud" combat style of using smart weapons during unavoidable combat (Yinglong is really good). Ping affects everyone with a quickhack for a long time so you can Overclock and get the 25% damage bonus from Smart Synergy.
For the last 3, you can take whatever, but this has been my loadout: Cyberware Malfunction, Cyberpsychosis, and Bait. You technically don't need Bait anymore but I like having the option; it can be swapped out for Synapse Burnout or one of the other combat quickhacks you prefer. Cyberware Malfunction is a premier debuff on the cheap and shuts down all sorts of annoying enemy types, increases your weapon damage, deals damage over time, and can even explode for large amounts of damage if stacked high enough (8 stacks). The more important factor, however, is using 3 of them against a target reduces the cost of Cyberpsychosis from 22 to 6. In big combats, I like to hit elite enemies with 3x Cyberware Malfunction followed by Cyberpsychosis to take pressure off. Note that Yinglong EMP explosions also reduce Cyberpsychosis cost and can be used to get enemies with high RAM costs into range of the ultimate quickhack. Using Cyberpsychosis and hacks to make friendly turrets from stealth to create absolute mayhem is also a good way to break up the playstyle from just switching everyone off.
Note on the cost reduction for Cyberpsychosis: it only affects the enemy actually hit with the EMP effect, whether the quickhack or Yinglong, and it has to have already taken effect. This means you can't queue a cheap Cyberpsychosis after 3x Cyberware Malfunction (beyond the half cost, which is still 11), you have to actually let the effects land, then you'll see the cost reduction. You can do this from stealth by using T4 Memory Wipe followed by 3x Cyberware Malfunction, let them go off, then use Cyberpsychosis, making the enemies fight themselves without starting a trace or combat.
Weapons
Yinglong is fantastic; it does high damage, the EMP effect is frequent and powerful, and has great synergy with Cyberpsychosis. Pizdets is another great tool for taking out enemies from stealth, althout with this build it should be rarely necessary. Smart Snipers can be a lot of fun for another sneaky playstyle, although again it's mostly unnecessary.
For arms, Monowire is always good on netrunning builds, and I like to add Cripple Movement to it. It really helps with handling close-range bosses and getting back RAM in protracted fights. Gorrila Arms are a viable alternative, however, both for the effective boost to Body for opening doors and for making boxing quests much, much easier. I prefer Monowire but can see the argument for the Gorrila Arms.
Or whatever you want. Outside scripted fights I basically never use weapons. My hands and deck are enough.
Stats and Perks
This is all fairly obvious and can vary depending on where you are in the game and your playstyle. Max intelligence is a given and should be your highest priority, although you can survive at 15 or 16 int for a while if you want. None of your combos rely on the 4th slot and 16 is only 1 less RAM than a maxed out build.
I also highly recommend 15 cool. The stealth running and better camo are both massive quality of life improvements. You can use stealth weapons if you want but personally I don't see the point when takedowns and the Sonic Shock combo are instant kills. You more need tools to handle non-stealth scenarios.
Everything else is personal preference. I'm a big fan of the tech tree both for opening doors and getting more cyberware capacity. Both 15 and 20 are viable options, although I personally stopped at 15. The extra 50 capacity is nice but not worth the points IMO.
Reflex is popular for a reason. I lean towards 20 Reflex or Body over 20 Tech. Reflex gives you better mobility and Body gives you better survivability and Overclock synergy.
Personally, however, I go for the "jack of all trades" combo. I get 20 in Int and 15 in everything else, going 16 in Tech for the extra armor. This lets you get most of the best perks from every tree and have balanced offense, defense, and utility.
While Tailwind, Edgerunner, and Pain to Gain are all strong effects, none are worth losing Adrenaline Rush, Air Dash, Ninjutsu, or License to Chrome/Ambidexterity for IMO. Of those, losing Tech or Cool are probably the easiest to live with IMO.
Technically you can survive with 16 Intelligence and max out one of the other trees. All you lose is the 4th queue slot (which you don't need for your main combo) and 1 RAM. You don't want Spillover anyway as it can screw up your combos/trace and the capstone for smart weapons is also unnecessary. It's arguably the "optimal" endgame for this build as the other capstones are more impactful to the playstyle.
The only reason I hesitate to recommend it, and didn't do it myself, is that it makes the early game a lot harder, and the late game is already fairly easy. I suppose you could use the one-time stat reset if you wanted to really maximize the build, but I'd probably only do it myself to get Tailwind.
Conclusion / TL;DR
I hope you enjoyed that build! If you ain't got time for all that, here are the key points:
- Early Game: Use Bait twice, once to draw an enemy over and another to prevent them from walking away after turning, to get early game takedowns.
- Mid Game: As above but use T3 Memory Wipe to get behind them undetectably.
- Late Game: Use T3 Memory Wipe, T2 Reboot Optics, and T5/Iconic Sonic Shock to take enemies out, then weave in reduced cost System Collapses generated from the -25% trace on T3 Memory Wipe