
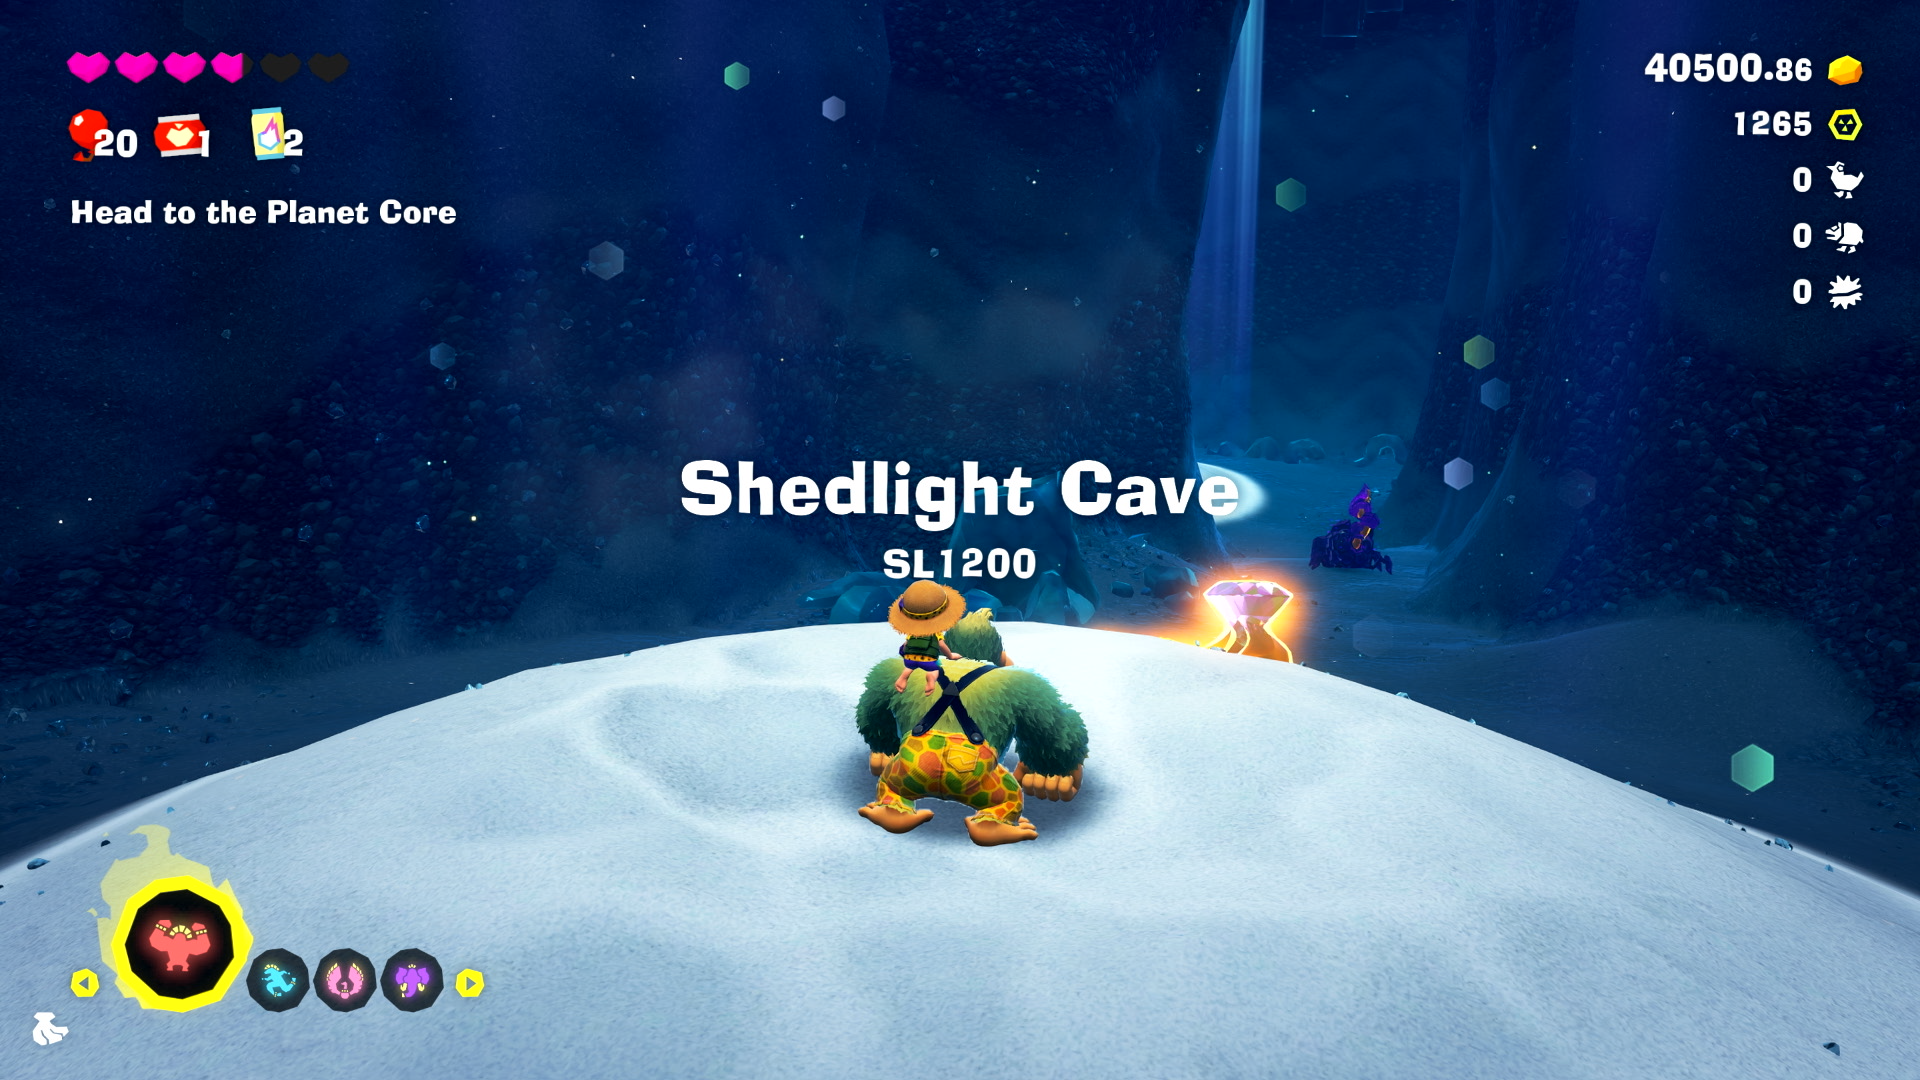
After making quick stops in the Landfill and Racing Layers, DK and Pauline are back on the trail of Void Kong in a new layer full of darkness and light: the Radiance Layer. This walkthrough will guide you through the main story of meeting the inhabitants of this layer and their Elder who holds a new Bananza power, and making your way through darkened caves to restart the sources of light that illuminate these areas, as well as pointing out collectible Banandium Gems and Fossils along the way.
Total Banandium Gems to Find
Total Fossils to Find
Available Bananas – 67
Postgame Bananas – 9
Total Bananas – 76
Banana Bird – 61
Armadillo – 10
Sea Urchin – 1
Shedlight Cave (Sublayer 1200)

Arriving in the Radiance Layer, you may find a familiar sensation landing in a small darkened valley that makes up the surface sublayer. It’s a fairly short sublayer, but offers some substantial clues on what to expect here. Start by claiming the Banandium Gems that have fallen down from the Racing Layer to add to your collection. You can also find a Banana Bird Fossil on the wall behind you, 1 of 61 in this layer!
Ahead of you, you’ll meet one of this layer’s more notorious enemies called Gloominoids: A scorpion made of an amethyst-like purple stone that cannot be broken!
Normal attacks, and even using chunks have no effect, so instead try sidestepping it and running onward. Just past the Gloominoids, you’ll find a little snake that urges you to lure the enemy into the shaft of light that surrounds him.
Taunt the enemy over, and the second the Gloominoid touches the light, its purple stone will convert into a sandy terrain, making it all too easy to break apart and destroy the skeleton inside!
As thanks, the snake fellow will tell you about a sinister fellow that stole the light source for this layer, and headed deeper below, pointing you past a series of columns nearby. Be sure to grab another Banana Bird Fossil on the wall nearby, then cautiously head into the next ravine.
There are many armored Gloominoids in this area that surround the giant stake, as well as two Crockoids in similar unbreakable coating called Gloom Stone — one of which holds the key to unlock the stake.
In order to render them vulnerable, you can either lure them around the protected stake (which has a ray of light shining from above that may be difficult to make out), or you can get to work bash apart the several concrete pillars around the stake.
Each pillar can be destroyed — either by using your Kong Bananza, or grabbing a tougher chunk of blue stone and bashing the pillars repeatedly. The more light you have, the easier it will be to eliminate all the threats here.
Once the group is defeated and the stake is unlocked, be sure to look along the back alcove by a plaque to find one more Banana Bird Fossil, plus another in the main room by the stake, and then break it apart to reveal another Banandium Gem bunch, and follow it into the next Sublayer.
Glowboa Grotto (SubLayer 1201)
Arriving in the next sublayer, you’ll land on what appears to be a section of illuminating crystal that stretches on like a snake – fitting for this place, it seems. Be sure to grab the Banandium Gems ahead of you, and purchase the Getaway to the right of the Barrel Cannon that lets you head back up.
Be sure to check behind the Getaway that gets carved out to find another Banana Bird Fossil, and then head down the glowing snake carving to find a Checkpoint and some Snakes to speak with.
High above, there’s another stake in a curving plateau that’s preventing access deeper into the layer, but not only is the pathway unreachable, but the key is too high above the stake as well. You’ll be instructed to meet with the Snake Elder to find a way to get access.
After talking to the Snake, note the light fixtures that form small lamps around you. They are made from the same Glow Stone as the snake sculpture, and any chunk can be placed in an empty light fixture to create a permanent light source. However, if you don’t use it quickly while in your hands, it will slowly melt away.
Try it out by grabbing a chunk and placing it by the sealed wall by the Checkpoint, and it will create a permanent light source, triggering a door to open hiding a Banandium Gem.
You can also grab a chunk and charge the scorpion Gloominoids down the slope from the glowing snake sculpture, who will automatically be turned into sand when you draw close, and can slam the Glow Stone into them to defeat them quickly.
At the bottom of the sandy slope you’ll come to a large ore vein along some crystals. Break the ore apart and dig under to find an Armadillo Fossil, and then turn right to find a much larger enemy.
This cage-like bug is covered in spikes, and will try to charge you while holding resources in its body. Don’t try to attack it head on (and avoid the large poles it extends to trap you), and instead look for a nearby ledge or height advantage to climb up and then jump onto its back.
Perform a Dive Smash, and help yourself to the rewards it holds within, plus a Banana Bird Fossil in some crystal just behind it.
From the cage-like enemy you can also turn to the right to find a small “lake” of glowing ore surrounded by scorpion Gloominoids. Fight you way across to the large sandy dune in the corner, and you’ll find a Banandium Gem here sticking out.
Opposite the dune, you can find a small tunnel connecting the two “lakes” of glowing stone, with the entrance to the Radiance Layer Challenge Course 2 between them.
Constrictor Corridor
Head back up the slope past where the cage-like enemy was and chuck some of the Glow Stones at the Gloominoids posted here, before grabbing a Banana Bird Fossil along the wall.
At the top of the slope, you’ll find an illuminated carpeted entrance to a tunnel much like a snake’s tongue. The snake here will tell you the Elder built this tunnel, where snakes can move along the top, but since you can reach the top, you’ll have to move along the corridor’s bottom part where a Checkpoint is.
Opposite the entrance is a small area where the glass paneling opens up to reveal a Warp Gong and Getaway to build, plus a Banana Bird Fossil to the left, and then you can continue along the corridor toward the Snake Elder.
Speaking to the Elder, he’ll agree to teach you the Snake Bananza if you can rebuild his Ancient Record, which Void Kong broke and threw into four different art installations nearby!
Be sure to also grab the Armadillo Fossil high up behind the Elder’s chair before moving on.
You can attempt to find the record piece in any order, so we’ll be going from left to right. The snake next to the Elder will clue you in on what’s around: two art installations to the left, and two to the right.
Head to the far left of the Snake Elder to find another Snake who will tell you about the Pitch-Dark Pit.
Note that as you cross the land bridge over to the pit entrance, you can take a chunk of the light fixture’s glow stone and bring it near the other fixtures to add a permanent light source to them, something you’ll be doing more of before long.
Be sure to grab the Banana Bird Fossil above the pit entrance, and then hop in.
The light will fade as you drop down, and with limited visibility you’ll only be able to make out two things: A wall of thorns to one side, and a Barrel Cannon back up on the other.
You can use the Barrel Cannon to zip back up, grab one of the light fixture Glow Stones, and quickly dive back down to help illuminate your surroundings.
Use the Glow Stone (or similar stone) to bash apart the thorns, and look for a spot of dirt just past the wall. There’s an empty light fixture here, and you can bring your Glow Stone close (before it melts) create a permanent light here — one that you can keep grabbing more Glow Stones from as needed.
Take a new Glow Stone and move down the dark path to bash aside the Scorpion Gloominoids here, while looking for more dirt piles to reveal light fixtures you can attach Glow Stones to.
To the left of the second light fixture, you can illuminate a large sandy wall, and bash it apart to reveal another corridor with a third light fixture, and a thorny wall beyond.
Past the thorny wall, you’ll find one last large chamber with three Gloominoids, several mounds of treasure, and the Ancient Record on a far pedestal backed by two empty light fixtures.
Try dashing past the Gloominoids with a Glow Stone to illuminate the area, giving you a renewable source of Glow Stone to defeat the enemies with. Just watch out for the thorns that can sprout up on the sides of the room.
Once you have the Ancient Record piece, bash away the thorns to get a Banana Bird Fossil and mine the Gold ore, then return back to the entrance to blast up and return the piece.
Next to the path down to the Pitch-Dark Pit, you can find a cave entrance by the Snake Elder leading to the Sizzling Sunbath.
The room is fairly simple, with the Ancient Record piece on the opposite site of the small circular room. It features a pool filled with the molten essence of a synthetic sun, and atop it waits another spiky-cage like enemy, who can extend concrete protrusions to block your access to reaching the record.
Jump over the concrete they extend before they can start spinning to reach the Ancient Record on a raised platform the enemy can’t reach. From here, you can lure it toward you and then perform a chunk jump to get on top of it, and then use your Kong Bananza to bash through (just make sure you don’t fall into the lava!
You can also use (or swap to mid transformation) to the Elephant Bananza, and inhale all the molten lava in this room. Not only will this cause the enemy to fall into the recessed pit, but you’ll also find a Banandium Gem in an alcove down here!
After returning the second record piece, head to the right of the Snake Elder, where you can cross a short bridge to a large spiraling snake sculpture called the Sidewinder Slide.
You’ll need to head down a level until you reach a balcony, where you’ll find the sleek snake scale walls of the sculpture lead downward toward your goal. However, some of them are electrified, and you’ll need to carefully slide down while angling yourself in the right direction.
Start by climbing to the right and follow the trail of gold ore until you hit the sleek part of the walls, and start sliding down between the electrified sections.
Keep using the gold ore as a guide to know where to slide to, and be ready to make some sharp turns to the right and then left.
Once you make it all the way to the bottom of this section, you’ll find the Ancient Record piece, but there’s still more to fall down. Don’t worry about problems holding the record, as DK can still slide down without using his hands.
The next section is even more tricky, with many twists and turns to quickly navigate. You may take some damage here, so it’s worth making sure you have apple juice on hand.
At the very bottom of the exhibit, you can find a regular stone wall at the base to blow open and reveal a Barrel Cannon, taking you all the way back to the top.
The last ancient record piece can be found up on the hill behind the Elder’s Court, where you can also build a Getaway to rest up after sliding down that electrified column.
A nearby snake will tell you about the Zip Line up ahead, which requires some slippery iron to ride across. Unfortunately, they’re all out of sturdy chunks to make the trip, so you’ll need to find your own.
There are many scorpion Gloominoids up ahead that have taken up residence along the entrance to the Zip Line, and the snake will suggest you use their iron as replacement — but that means being careful about how you deal with them.
There are several concrete pillars in this area that you can bash apart with a rock (or your Kong Bananza) to spill shafts of light down, plus a small mound of dirt toward the end that hides an Armadillo Fossil underneath.
Your objective is not to kill the Gloominoids, but to lure them into the light. When they turn to sand, they’ll stop attacking and assume a balled up defensive position, and you can actually grab them to take a chunk of their body with you — becoming slippery iron when you move away from the light.
Take one of the Gloominoid chunks back with you to where the Snake was, and then jump up on the nearby platform to start riding the Zip Line.
Eventually you’ll reach an area with the Zip Line expands into five lines, and you’ll need to jump around them to avoid hitting some Glow Stones (if you get too close, your slippery iron will turn to sand, causing you to fall through).
As you do, be ready to jump from the middle to the right in quick fashion to reach a Banandium Gem on a high slippery platform to obtain it.
Drop down to grab another Gloominoid’s hide and collect a Banana Bird Fossil, before using the Barrel Cannon nearby to return to the Zip Lines.
Reach the very end, and you’ll find the last Ancient Record Piece!
To get back, simply hit the small blue balloon next to the Zip Line you came in on. This will cause the platform to rise up, giving you a height advantage to zip back the way you came before it lowers back down (once you align it with the Banandium Chips, you’ll be good to start the way back).
Return this last piece of the Ancient Record to the Snake Elder, and one last time you’ll be able to work with Pauline to unleash a new Bananza!
With the Snake Bananza, you’ll bounce instead of your normal movement, which can take a bit of getting used to. The plus side is that you’ll now have a double jump that can be used by tapping the A button in mid-air!
Even better, heights will cease to be a problem for you, now that you can hold down A to build up a Charge Jump and release the A button to zoom up to greater heights you couldn’t reach or climb normally!
Finally, you’ll also get the unique ability to perform a Glare by holding Y. This has the effect of essentially slowing down time on both enemies and moving objects nearby. Use it in conjunction with your ability to double jump and charge jump to reach greater heights, and try using it in this tutorial section to slow down time when the climbable wall appears to reach the top before it moves out of range.
With the power of the Snake Bananza, you’ll finally have the means to dive down into the next area. Give your new transformation a whirl by turning away from the Snake Elder to activate it, then perform a charge jump onto the top of the Constrictor Corridor, where you’ll find a Banandium Gem.
Head across the top of the corridor, bashing through the gold ceilings if you want, and grabbing a Banana Bird Fossil as you move toward the back.
Along the way, you can charge jump to a high platform above the Warp Gong if you want, where you’ll find the entrance to the Radiance Layer Challenge Course 1 (accessible during Bananza form), and another Banana Bird Fossil above the entrance.
At the end of the Constrictor Corridor, climb to the top using a Charge Jump where you’ll find two of the spiky-caged enemies guarding the path to the stake. With your jumping skills, you can easily double jump on top of them before performing a Dive Smash to get them out of your way.
Once you reach the stake, use your Charge Jump to boost high above the stake directly to get the key, and unlock the pathway down.
Sculptor’s Studio (SubLayer 1202)
After two layers, you’ll finally arrive in something resembling a town… except someone turned out all the lights. Despite being a much more open layer, someone seems to have turned off the synthetic sun here. At the very least, you’ll be able to collect the Banandium Gem reward for arriving here.
Though it can be hard to make out this area, there’s a few things you can do around this circular area:
A small slope leads up to a Chip Exchange and Stuff Shop where you can restock on supplies. There’s also a Banana Bird Fossil buried in the stone between their two signs.
To the left of the shops, there’s a sealed entrance to an underground area that seems to work on solar power, but you can check behind it for a large chunk of crystal hiding a Banandium Gem.
To the right of the shops is similar building entrance – and while glowing, you can break the seal to open it, leading down to the Radiance Layer Combat Challenge 2 to defeat some Gloominoids by shining a light on them for a Banandium Gem.
On the opposite side, you can talk to a Snake sculptor, and inspect the crystals around him for one hiding a Banana Bird Fossil.
The large crystal he’s working on is actually hiding a hole you can dive in.
At the bottom of this pit, you’ll enter a room with a large fence surrounded by molten lava, but a cube Fractone on the far side will offer a boost.
Using your Snake Bananza, perform a Charged Jump to the ceiling mesh above to grab hold, and climb around to reach the other side of the gate, where you can drop down to claim another Banandium Gem.
When you’re ready to solve the mystery of the dark, head down the dirt path to find another Banana Bird Fossil along the road, and a Snake on a high peak to the right overlooking a large structure with glowing eyes.
Apparently you can restart the Synthetic Sun from the top floor of the building, but it will require you to perform a long climb to get there.
Looking over the cliff, you can spot an area below to fall down into – be sure to knock down a rope box first so you can easily climb back up here if needed!
At the bottom of the ravine, you’ll find a sealed entrance to a room behind you, but you can still climb up to reach the Banana Bird Fossil above the structure’s entrance.
In front of you are 2 more Banana Bird Fossils encased in crystal, and a bunch of Crockoids… also made of crystal. Thankfully this means they aren’t much of a problem, and you can clear the way to the large tower (ignore the area on the left for now).
Solar Control Tower
Entering the tower, you’ll find a Getaway to build on the right, and a Snake who will give you a useful tip about climbing the tower: Use your Glare ability.
To start ascending this tower, hop onto the ledge on the far wall in your Snake Bananza form, and hop over the flaming barrels as they fall down (use Glare if you need to slow them down).
Perform a Charged Jump on the left side to follow the trail of Gold ore up to the next level, and wait for the next barrel to crash on by to the right. Follow it, and attack the Banandium Gem up below the ledge quickly, and then circle around to reach the next safe platform with a Melon.
With your Bananergy levels replenished, keep hopping to charge jump over the next platform, and look for the next ledge where several flaming barrels come out of the walls at the same time.
However, your Bananza should ping the location of another Banandium Gem located behind the wall the barrels are coming out of. The moment they roll out, use Glare to slow time and rush in to break the banana.
Grab some more Bananergy from the melon at the end of this ledge, and knock down the rope box for easy access from the Getaway before making the next Charged Jump up.
On the next landing, a Snake will encourage you to “Glare and GO”, meaning you should be ready to hold down Glare and use it to evade the parade of flaming barrels coming your way. Try to utilize both a Charged Jump and double jump to gain airtime, and then let go of Glare once you’ve gotten high enough to let the barrels roll under.
There will be one more rope box to knock down after this segment, and some crates at the corner with gold ore if you need it.
Ahead of you, the platform ends with a section of Voided Terrain, and you’ll need to climb the purple terrain up and to the left to locate the gizmo. Sing while you’re close by to unlock it, then Charge Jump from below to break it.
Take the newly unlocked Barrel Cannon up to the next room, where you’ll be pitted against several Gloominoids and a Crockoid encased in armor. The ceiling happens to be coated in Glow Stone, so jump up through to break the ceiling to pieces, and grab a chunk to swat the enemies away with. When the Crockoid falls, it’s key will unlock the switch.
The Synthetic Sun above will power up, illuminating this entire layer in blinding sunlight!
With the area lit up, the solar powered door in this room can be activated by punching it, leading to a Checkpoint, another door hiding a Banana Bird Fossil, and a Banandium Gem for your efforts.
While you’re here, you can also unlock the ruins entrance nearby to the Radiance Layer Challenge Course 3, featuring a fun homage to DK’s original stomping grounds!
You can now head out onto the balcony to see the layer resplendent in light, and pay a Constructone to build a bridge back to the little village (which you should).
There’s a couple new things to check out now that the place is lit up, but if you want to get back to the main path, talk to the Snake at the end of the bridge who will note the path to the next Sublayer has now been unlocked thanks to the solar door below. Jump down to the ravine below where all the crystal Crockoids were.
Head to the large circular walkway past some of the crystal Crockoids (and grab a Banana Bird Fossil in crystal around the back), and speak to the Snake here. It’s heard something creepy down below, and it seems you’ll be the one to figure out what it is.
Turns out, it’s an old nemesis who is ready for round of battle: Poppy Kong!
A few things will have changed for this fight, but the basics remain the same: Poppy will use an invisibility perfume to hide herself, and try to ambush you by dashing at you from different angles.
Like before, the arena will be coated in a powdery sand that you can use to see where she’s coming from. However, it will be a little less useful at first because she moves EXTREMELY fast.
The good news is, you just unlocked an ability to serve as an equalizer: Glare.
Hop into your Snake Bananza form, and hold down Glare when you see her start to move. You can use it to plan where she’s going to attack from, and either dodge her made dashes, or try and line up a punch when she moves toward you or bounces off a wall.
If you decide to play defensively and dodge, you need only wait for her to dash several times before hitting a wall, then make sure you Glare to keep her locked in her dazed state while you rush over and attack.
After the first beatdown, she’ll knock down more sand, and will start incorporating zig-zag dashes into her moves, making her harder to track and counter even while Glaring at her.
Luckily, you can still charge jump into the air and perform a dive smash while she dashes underneath.
Keep it up for around three times in total, and watch out as her moves get more erratic and harder to track. Pay close attention to the dust clouds she kicks up when she moves, especially moving through small lumps that contain Gold Ore so you can track her even when she moves erratically.
When finally defeated, she’ll officially quit her job a Void Co, and promise to trouble you no longer (there’s no profit in it, after all). Once she gives you the key, head on down to the next area.
Serpent Sands (SubLayer 1203)
It’s been a long ride, but you’re in the final major sublayer now, and like the one above, it’s been blessed by the Synthetic Sun you recently activated, making things easier to navigate.
You’ll start in a large crater along some Voided Terrain, and your Banandium Gem reward right in front of you.
The sands hold a ton of secrets you can explore at your leisure, but we’ll focus on the main path for the moment. Just over the rim of the crater opposite the trail of the Voided Terrain, you can find the main village for the Radiance Layer.
Hiss Hiss Oasis
This large open air market is home to a lot of amenities you can take advantage of, starting with a Getaway to build to the left of the Checkpoint.
Along the market, you’ll also finally find a Style Shop to spend those hard-found Fossils on new outfits:
Forest Layer Style Shop
Name
Effect
Cost
Black BritchesReduces damage from enemies by 10%
1 Banana Bird Fossil
Defense Britches (Level 1)Reduces damage from enemies by 15%
5 Banana Bird Fossils
Defense Britches (Level 2)Reduces damage from enemies by 20%
10 Banana Bird Fossils
Defense Britches (Level 3)Reduces damage from enemies by 25%
3 Armadillo Fossils
Banandium Chip Bolo (Level 1)Increases the chance of doubling any Banandium Chips you collect by 20%
1 Armadillo Fossil
Banandium Chip Bolo (Level 2)Banandium Chip Bolo (Level 3)Purple Radiance Outfit (Level 1)Extends your Snake Bananza time by 40%
5 Banana Bird Fossils
Purple Radiance Outfit (Level 2)Extends your Snake Bananza time by 60%
10 Banana Bird Fossils
Purple Radiance Outfit (Level 3)Blue Radiance OutfitExtends your Snake Bananza time by 40%
5 Banana Bird Fossils
Rattle Radiance OutfitExtends your Snake Bananza time by 40%
10 Banana Bird Fossils
Lemonade Gradient FurGives DK’s fur a Yellow and White hue
5 Banana Bird Fossils
Shiny Cyan FurGives DK’s fur a sparkling shiny blue hue
10 Banana Bird Fossils
Across from the Style Shop, you can find a sealed ruins, but nobody to open it, and an Armadillo Fossil high above you’ll need to jump up with your Snake Bananza to crack.
Note that if you still want to buy more from the shops, it may be worth rolling out to the right into the dunes outside past where you got the Armadillo Fossil. Head to the large ring of concrete to find a giant Sea Urchin Fossil guarded by reverse Gloominoid Scorpions that only turn to sand in the shade.
Back at the entrance to the Challenge Course, you’ll notice its at the base of a giant snake sculpture made blue stone. Climb up onto the snake’s head, and you’ll find its tongue is made of Voided Terrain.
Drop onto the tongue, and punch through its mouth to find a gizmo to break, revealing a Banandium Gem on the tip of the snake sculpture’s tongue.
From your vantage point on the snake sculpture’s tongue, you can spot a small opening on the lower snake sculpture along the left side of the market behind the Style Shop. Drop through the hole, and you’ll find the Constructone to open up Radiance Layer Challenge Course 4.
Up the road from the market, you’ll find the Oasis Observation Deck Checkpoint. Here you’ll find a few more interesting things, like another Growtone that wants a ton of Gold Ore to give you up to 3 Banandium Gems.
in the center of the oasis pool of water lies an interesting device: a snake Light Switch that will alternate turning two different Synthetic Suns on and off: One to the left, and one straight ahead. This will become very important in the road ahead as you’ll need to make use of light and shadow.
There’s also an easy to miss secret while talking to the Snake about the light switch – atop the two large snake sculptures flanking the red road leading onward, you can spot Cranky Kong and Rambi! Climb up to listen to Crank’s rant, and you’ll get another Banandium Gem.
Head down the snake tongue-colored pathway to a series of floating platforms in the sky. Here you’ll find the reason for the Light Switches: a patch of purple cloud-like platforms that will vanish if you try to step on them while the sun is shining from the left.
However, upon hitting the Light Switch to make the sun straight ahead appear, the shadow formed by the building ahead will cause the clouds to form solid platforms to cross over.
Be ready to contend with a spiky-cage enemy on the other end of the bridge, and grab a chunk of stone to Chunk Jump atop and slam down (or use your Snake Bananza).
Climb the wall beyond, and gently pan your camera around as you climb. You’ll spot a Banandium Gem hanging from the ceiling of the platform above, and you can carefully slide around the side of the wall you’re climbing to move along the mesh ceiling on the other side and claim the Banandium Gem.
Window Viper
You’ll now find yourself at Checkpoint for the long winding snake-like structure adorned with windows and walls. Head down the corridor to a large window pane, and break it open to grab a Banana Bird Fossil before turning left.
As you turn, you’ll be up against a Crockoid in impenetrable Shade Ore armor, but what you really need to do is lure him into the light. Dodge past him into the next room to find another Crockoid next to a Light Switch and window, and lure them both using the switch to a place you can destroy them.
Once defeated, be sure to check around the honeycomb wall pattern nearby to find another Banana Bird Fossil.
There should be one last Crockoid around the corner guarding a small locked stake, so make sure the sun is shining in from the left to come through all the windows and render him vulnerable to your attacks, so you can collect his key to open the stake.
Before diving down, check the cracked wall opposite the stake to find a platform on the other side that hides the Radiance Layer Battle Challenge 6, which you can undertake to earn another Banandium Gem.
Diving down to the lower corridor, you’ll again have to get through several armored Crockoids. To make matters worse, the right wall is covered in moving concrete walls, and the Light Switches are on the ceiling.
Use your Snake Bananza to jump up and hit the switches (or throw chunks at them) and time your attacks when they are exposed to the light pouring in. Once one of the Crockoids drops their Boom Block weapon, you can use it to explode the Concrete to help you out.
Be sure to hit one of the Light Switches as you turn the corner to re-orient the angle of lighting for the next corridor where two more Crockoids (one with a Banana Bird Fossil) guard another locked stake.
Defeat them both when the light hits them, and then drop down out of the corridor and into the open cloudy air.
Shade Clouds
Now outside the corridor, you can see the stake leading down to the final SubLayer is encased in a large glass building nearby. To get there, you’ll need to take the long way along the cloudy platforms.
Climb up the pillar here to each the cloudy section, where you’ll once again need use of light and shadow to create pathways. Be sure to head left first to find a Getaway to heal up at (plus a Banana Bird Fossil behind the rest area), before heading right at the first intersection.
If you kept the light switch in the right angle on the corridor above, there should be a row of solid cloud blocks formed by the shadow of the nearby pillar you can cross.
While you’re here, be sure to use your Snake Bananza to Charge Jump to the top of the large pillar coated in oily metal. There’s a Banandium Gem for you to nab at the top before jumping back down.
There’s also an Armadillo Fossil along a cloudy platform you can walk to (and turning it to Shade Stone renders it unbreakable) so toss a stone chunk at it instead).
It may seem like you’ve reached an impasse here, as there are no more shadows to work with. However, look among the clouds to find a floating Light Switch moving back and forth.
Grab a Stone Chunk and toss it at the switch to change the light angle, and you’ll find it’s created several new platforms. One now leads to another far pillar, past a smaller blue square structure.
Note the 2 Banana Bird Fossils embedded in the Shade Stone here — you’ll have to turn the Light Switch again until they are part of the clouds to toss stone chunks at one, and break apart the blue stone block to allow light to reach the second.
Once you’ve crossed to the second large pillar, you’ll find the base of the pillar coated with oily metal, but there’s a middle section of regular metal. Use your Snake Bananza form to Charge Jump up to the metal section in the middle, and then Charge Jump against to reach the top.
Here you’ll find a trap door you can activate to fall down below the clouds, and locate a Banandium Gem to add to your collection.
To continue onward, throw another stone chunk at the light switch so that it’s shadow now points in the other direction, and cross over to where a Fractone is.
Speaking with the Fractone, they’ll note there’s actually a path below this Shade Stone, but it can’t be reached currently due to the pillar’s shadow.
When the view zooms out, note that the third pillar in the distance is equal height, but has regular stone at the top: this is the key you’ll want to remember.
Head back the way you came to grab a Stone Chunk, then return to the Fractone before tossing it at the Light Switch, allowing you to run over to the third large pillar.
While you’re here, you can also try throwing a stone chunk at range to clip the Light Switch, changing the shadows to reach a Banandium Gem off to the side on a dead end platform to the side.
To solve this particular conundrum, you’ll need to use the power of the Snake Bananza. The base of the pillar is coated in oily metal, but you can Charge Jump up past it to cling to the metal above.
Climb to the very top, and start breaking apart the top block of stone to shorten the pillar’s shadow, revealing a spot to drop down where the Fractone was standing among the clouds.
Jump into the pit to find where the Fractone went – right to where the stake is leading to the final Sublayer of the Radiance Layer. Before chasing the bananas down, be sure to talk to a nearby Constructone to build a bridge shortcut back to the start of the Shade Cloud area.
Crystal-Cobra Den (SubLayer 1204)
This final area is much smaller than the one above, but you’ll still have a few things to take care of before you can reach Grumpy Kong. In front of you, grab the Banandium Gems that have fallen next to yet another stake — this one sealed and requiring a key.
Next to the sealed stake is a snake-shaped Fractone. Speak with him and he’ll alert you to something causing the ground to shake further past the stake down another pit at the back of this large cavern.
Before moving toward the source of the noise, be sure to stop to build a Getaway on the right side, and then check the opposite side for an entrance to the Radiance Layer Challenge Course 5.
Just above the challenge course, you can bash your way through one of the crystal cobra sculptures to find a Banana Bird Fossil. Another Banana Bird Fossil can be found encased in crystal just past the stake, above another snake-shaped Fractone.
When you’re ready for your big rumble, head to the end of the cavern and punch through the crystal floor to drop in on Grumpy Kong for a rematch against his giant monster building skills.
Just like in the Canyon Layer, Grumpy Kong will build himself a giant Crockoid mech to pilot, armed with a Boom Block hammer, and coated in Gloom Stone that is impervious to your attacks — in the dark, anyway.
Grumpy Kong’s attacks are no joke this time around — one slam from his Boom Block hammer and he’ll send a shockwave of explosions in your direction, so be ready to roll away to the sides when he begins the motion of slamming down his weapon in your direction.
To even the odds a bit, you’re going to need to let the sun shine, which means opening a few curtains. If you look around the arena, you’ll notice several blue stone ceiling domes poking down, and a few empty ones where light is shining in.
With this knowledge, you can grab chunks of stone from the pillars in this arena (or better yet, chunks of Boom Block that become dislodged from his attacks), and chuck them straight at the ceiling.
In a pinch, you can also try using your Snake Bananza to Charged Jump up to the ceiling and strike upwards.
Hit enough of the ceiling domes around Grumpy Kong’s creation, and the light will shine down around him, turning his impervious armor into dirt!
Note that Grumpy Kong himself rides atop the construction like he did in the Canyon Layer, only this time he’s wearing a helmet made of Gloom Stone, so even if you try to jump up top earlier on, he’ll be impervious to taking actual damage unless you get him in the spotlight, so to speak.
Once he’s vulnerable, run in and start bashing apart his construction until its collapses fully, leaving just the top portion stuck in the mud. This will render Grumpy Kong dizzy and exposed, allowing you to bounce up top and start giving him a beat down! As long as he’s in the light, you’ll be able to destroy his helmet and start dealing real damage.
At this point, all he can do is try his spinning pickaxe attacks, which he telegraphs when the pickaxe begins to shine. If you’re in the Snake Bananza form, you can use your Glare to slow his attack down, and simply Charge Jump above him during his spin until he gets dizzy and slam back down to finish the job.
When Grumpy Kong is defeated, it seems like it’s another job well done… until a surprising twist throws everything into disarray!
Before you can react, Pauline and DK will become separated, and you’ll fall down a chasm into the next area — The Groove Layer — alone!