
After destroying a 14900k i just bought and having higher then expected temps i did some mods to my direct die kit.
​
https://preview.redd.it/lh0cvqbe3vhc1.jpg?width=640&format=pjpg&auto=webp&s=a85989f102bed6f57d2d011199629dca24292da0
Observations:
Intel 13/14th gen dies are convex
Ekwb direct die plate is convex.
Clamping pressure is in question.
Outside lga pins do not load properly( unconfirmed but a very firm supposition.
My 14900k burnt random pins all around the edge of the lga array. The board did not die but mem controller 0 will not work on either a 13900k or a 13900kf.
Steps. Have a very flat and clean surface preferably glass.
400 grit /1500 and 3000 wet sand paper. Lots of liquid metal.
1500/3000 should be done with water. The cpu will be fine.
Cpu prep. Protect lga array as pictured do NOT use electrical tape like the picture, use a quality painting tape and rub your fingers all over hard after you apply tape. Especially on the tape overlap and the 4 alignment notches on the cpu.
​
https://preview.redd.it/ixx08t1h3vhc1.jpg?width=3024&format=pjpg&auto=webp&s=74a629e49a7c88f2cff27c1bdd24b54f1bbab903
https://preview.redd.it/1ilmpfqk3vhc1.jpg?width=3024&format=pjpg&auto=webp&s=074d34bcc05fc4de5af22f3d6093ed5b9807a929
Have paper towels and rubbing alcohol ready.
Apply 2 coats of conformal coating with a qtip as shown. This protects the topside exposed components fom lm and adds a little extra contact pressure when you put the die guard on.
After 30-60s of application for each coat, remove tape and make sure you don’t have paint on the lga side. If you do you that is not ideal. You have a limited window to wipe it off. Coat paper towel in rubbing alcohol. Wiping from the center of the lga array and the out towards the contamination and off of the cpu. Repeat as necessary. Each wipe from the center out requires a new piece with alcohol on it. If you wipe then go to center and wipe out again you will coat the entire array in a conformal/ alcohol solution. When the alcohol evaporates you will not be happy.
​
https://preview.redd.it/8dso3gop3vhc1.jpg?width=3024&format=pjpg&auto=webp&s=6304582ea4defdc0654ea12dff3c28b7eaed41f1
Next.
Waterblock mods.
The cold plate is concave we want it flat.
Start with disassembling your waterblock until you have just the cold plate. Sand down cold plate until you can just barely see the dot in the center with 400 grit. That is dumb to see who leaves a depressed mill dot in the center of a direct die interface?
Sand more with with 1500 and then 3000. Do not mirror finish, 3k scratches are wanted.
400-1500 rotate the block however you are holding it in your hand 90 degrees every 3-4 seconds. No one applies pressure evenly but that helps make it a wash. Sand in a 3in or so radius circle on the paper.
3000 grit. Super light pressure, this will take a while, do the same pattern/rotating in hand.
Apply lm in a heavy coat and allow to sit for 30m.
Remove and polish with a paper towel vigorously. Will now be the appearance of nickle clad instead of copper.
Sand again with 3000 to confirm all mill marks are gone.
Reapply lm and polish with paper towel after letting it sit for 30m.
Do cpu, the. do the die guard mod, you will need the cold plate only for this.
When done set all wb pieces to the side, do not reassemble.
​
​
Cpu die. Optional but highly recommended.
Use on 3k grit. Using 2 fingers on the back of the die sand in a circle wirh a 1.5in radius or so. See lga grid pic with number.
With 2 fingers place them on position 1, keep the die flat and use very low pressure but not so little you don’t keep full contact on the paper. After 1.5s rotate finger to position 2, after another 1.5s position 3. Inspect die for color change. See color change guide.
Rotate cpu 180degrees and repeat pattern.
​
https://preview.redd.it/nbeg8o4w4vhc1.jpg?width=1190&format=pjpg&auto=webp&s=5fd769b64b25d168f0407d5e0469ab7366495cab
As you sand you will see a pronounced color change immediately as the immediate layer is removed. Eventually you will see a 3rd change, it looks almost identical to the layer under a vanilla cpu die however it will appear more.shiny as its exposed. I recommend you stop when this appears.
It goes as follows vanilla die then very visible color change then shinier layer of same color hard to make out then blue hue layer and finally actual cpu and your fucked so the last layer would be garbage can.
I will take it near the blue hue layer but that layer is extremely thin and if you hit cpu circuits your fucked. The lm will short it out. I sanded a die down to the diffusion layer as pictured for science. If you take off too much your cpu will have similar value.
https://preview.redd.it/ufsunu075vhc1.jpg?width=3024&format=pjpg&auto=webp&s=7ae330f751e5bfb44b1d0d7b9d8ac53891bb2e55
Do NOT polish die you want the tight circular 3000grit scratches to mitigate the lm being pushed out during heat cycles. It does not stick to the layer your sanding into m, its basically lm repellent. Here is how much I took off next to a stock die. Notice I did not get the entire thing perfect, I did not want to go much deeper however.
https://preview.redd.it/jke7scoe5vhc1.jpg?width=640&format=pjpg&auto=webp&s=b0f3f7fbd39cbe950e4bcebfd56781bb7325bd48
Step 3 die guard.
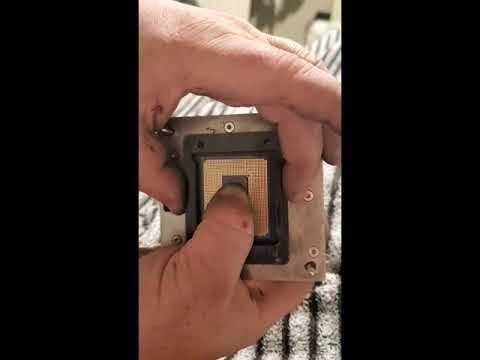
See video now.,
[https://youtube.com/shorts/Uwc0G8Bnswc?si=Ih-vFCL7NRMgpYCb](https://youtube.com/shorts/Uwc0G8Bnswc?si=Ih-vFCL7NRMgpYCb)
You want the cpu placed in the correct order and orientation as it would be in your mb and to have just a little resistance to rotation when your squeezing the die into the cold plate with your fingers. I went for just after I had 0 resistance to rotation, I would recommend being safe.
My die guard after sanding it down to set clearance.
​
https://preview.redd.it/79d8cvyo5vhc1.jpg?width=3024&format=pjpg&auto=webp&s=5fd58097295f11f0e65cebe9cebf450f4e166364
Cpu shim. Use a piece of foam out of the direct die kit box, shave it down thin and cut as shown in picture so its under the center of the cpu die. Do a finger push down test and make sure light pressure has the compression pictured.
Sitting on foam
​
https://preview.redd.it/pfiztdis5vhc1.jpg?width=4032&format=pjpg&auto=webp&s=0de3c2d909af4ddcefd9bb2b20a60a09eccf022a
Light hand pressure compression
​
https://preview.redd.it/xg5fht6w5vhc1.jpg?width=4032&format=pjpg&auto=webp&s=da08398ea113328de9e1f564ecbce4c4570c042b
Foam placement and size
​
https://preview.redd.it/18r5f4q16vhc1.jpg?width=4032&format=pjpg&auto=webp&s=d2e94dbcff6bba13a9904b043a5019941b225cc0
Reassemble waterblock.
Lm squeeze out test.
Place mb on cardboard on flat surface. Install cpu and die guard.
Apply a very small dot on lm in center of cpu die. Assemble per.normal keeping everything as flat as possible at all times. This can be awkward.
​
https://preview.redd.it/615illg46vhc1.jpg?width=3024&format=pjpg&auto=webp&s=b23f1ac1501ff245421a5c1d6cd841fc86b89346
You want to see a circle of lm residue on the cpu and waterblock that appear substantially similar, all lm should of been squeezed out. This is good. With everything perfectly flat and clamp pressure set correctly you will have extremely little lm on the cold plate/cpu interface. Ideally just enough to fill the 3k scratches on each surface if you did it perfect. . See example pics.
​
https://preview.redd.it/c7miekm96vhc1.jpg?width=3024&format=pjpg&auto=webp&s=a4e66fa12cb8cbbccbc816bac91a8fa0f0672cdb
https://preview.redd.it/3fo6qlm96vhc1.jpg?width=3024&format=pjpg&auto=webp&s=273bb317bc367a77fc26a0b689d186148fc5be04
Apply rtv gasket maker around the cpu/die guard to trap all the liquid metal tour about to apply so you don’t short out stuff when it pools and gravity takes over.
​
https://preview.redd.it/gs50jl0f6vhc1.jpg?width=3024&format=pjpg&auto=webp&s=850d38ba023879e5d6e62e2d350c0f049d2ef7a0
Lm prep. Keep all parts of install perfectly flat, as your about to find out the lm no longer sticks to your cpu die no matter how much you try. You have to use an excess and pool it on the cpu die to get coverage 99% will be squeezed out. This is why you do NOT polish the die. The scratches give geometry for the lm to stay in place via surface tension long term, it has very little adherence to the cpu layer you sanded down 2.
​
https://preview.redd.it/24goioai6vhc1.jpg?width=3024&format=pjpg&auto=webp&s=7facd972a590a2d73188d7cec616a99a0989b381
https://preview.redd.it/ciq63nai6vhc1.jpg?width=3024&format=pjpg&auto=webp&s=c0a9a28e860982bdd44e6be8585ff9e8b05b57fc
​
Install cpu cooler , keep everything level! I put some pretty good torque on it as we did sand and test every layer so a smashed sandwich of backplate, mg,socket, foam under die, cpu and cooler is perfect after all and I didn’t fear a die crush/crack. Done that on a few cpu over the years.
Results. 380w load from 90c to 80c, max wattage at 100c from 450w or so abouts to did not test, I stopped at 450w 91c. 450w is my soft cap on wattage personally for anything even short duration.
1 Comment
WAYYYYYY too much lm on the die there.