

A Shapeshift Druid leveling build tears through the Campaign with a mixture of spells, combined with powerful melee attacks in Bear and Werewolf forms. Cast long-lasting spells like Volcano and dynamically Shapeshift into Werewolf form to leap into the fray with Pounce. Follow up by creating a series of fiery fissures with Fury of the Mountain, which continuously pulse with flame thanks to Shockwave Totems. Each pulse generates Rage, fueling your Rampage in Bear form.
Once you unlock the Druid’s Shaman Ascendancy you become a living Apocalypse. Combined with Walking Calamity, elemental destruction automatically targets everything around you while you rampage in Werewolf and Bear form. The combination of Druid’s spells, Talisman Shapeshifting forms, and Shaman’s powerful elemental effects make this build one of the games most varied and exciting leveling strategies.
The shapeshift Druid leveling guide build is designed to be the most powerful and comfortable leveling method for this class for both new and returning players of a variety of skill levels. Leveling as a Shapeshift Druid gives you everything you want for tackling the Campaign, whether from a fresh-start in a new League, or kitted out with leveling gear. Werewolf Form provides a huge amount of mobility with Pounce and its passive Movement speed buff. Human form Druidic spells give you sustained damage and a huge amount of versatility to tackle the most difficult enemies in the Campaign — keeping you safe in the Trial of Sekhemas, for example. Finally, Bear Form gives you excellent survivability buffs, damage scaling with easy Rage generation, and extremely powerful damage against bosses.
Shapeshift Druid Build Gear
You do not need specific resistances on any item, just get the required total resistances amongst all gear combined. You need to cap your Resistances at 75% unless otherwise specified in the guide!
This build doesn’t require any powerful gear or Unique items to function and level smoothly in the Path of Exile 2 Campaign. Follow this Druid leveling guide as it takes you through the campaign, skills, passives, and strategies to level this class in a powerful, and explosively fun way.
Path of Exile 2 is currently in early access, this means rapid development including frequent changes to builds as there are balance fixes and we learn more. Pin this page to be notified of any updates.
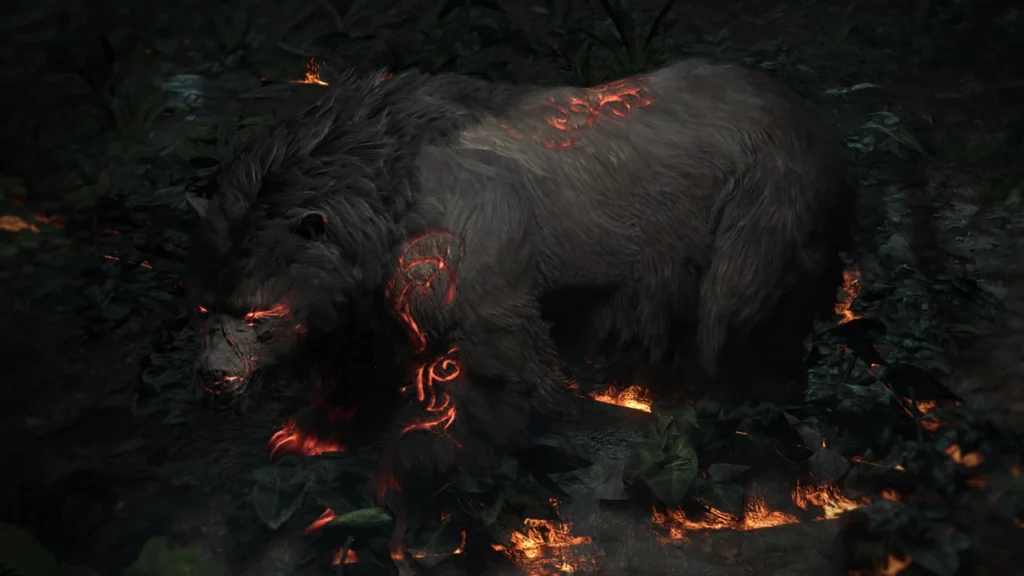
Early Access – The Last of the Druids
Shapeshift Druid Leveling Guide
The Volcano spell is the first gem you get and is useful throughout your leveling journey. Place it before you engage with Shapeshift attacks for sustained damage.Slamming a Volcano causes extra pulses of projectiles to be fired — for example with Furious Slam, Fury of the Mountain, and even Pounce. Shockwave Totem also triggers Volcano, and can trigger Fissures from Fury of the Mountain (which also trigger the Volcanos).The Overabundance I support gem allows you to have two Volcanos placed. These can both be slammed at the same time for more burst damage (at the cost of a duration penalty).Prolonged Duration I allows you to spend less time placing Volcanos, and more time slamming for a more comfortable playstyle.During the campaign, place Flame Wall on top of the Volcano to empower all of the projectiles with added fire damage!
If you don’t like Volcano, you can replace it with a Thunderstorm setup for some powerful Utility effects. Volcano is more effective DPS early on, but long-term Thunderstorm’s utility provides more benefits. See the Thunderstorm and Whispering Ice setups for more information.
Selecting the Druid’s Bear form on your Talisman provides you with the Maul basic attack. This provides a large amount of Rage on hit, giving you an easy way of generating Rage early in the Campaign.Rage increases your attack damage and empowers abilities like Furious Slam with more potent effects.Swipe twice with Maul and follow up with Furious Slam for an easy and powerful early combo.The Druid’s Werewolf Form provides a passive movement speed buff outside of combat. Wherever possible, run around in Werewolf form for make leveling faster and smoother. Using any Werewolf form skill leaves you in that shape until you use another skill. The simplest way to do this is just to use Pounce liberally as a movement skill.You can sprint and “Dodge Roll” while in Wolf form very quickly. Pounce, dodge roll, and then hold down to sprint to the next group of enemies.After using your spells at range, Pounce gets you back into melee range quickly, deals solid damage, and Marks the foe.Pounce’s Mark automatically applies to the highest rarity enemy hit, causing them to take increased damage. That same Mark also summons Wolf companions to protect you!The Savage Fury skill charges by dealing damage with your shapeshift attacks. Activate the skill for a powerful buff to your speed and damage. It’s the strongest first pick, being effective to boost clear speed and boss DPS.Vitality I and Clarity I are linked to this when you get more Spirit for passive recovery (which are always on, not just during the buff).For improved area clear, Herald of Ash is added once you get 100 total Spirit. If you prefer press less buttons during the campaign and don’t mind a power sacrifice, taking Herald of Ash first instead of Savage Fury means no buff management.Later on, Maul can be replaced by Fury of the Mountain for a more powerful Rage generation method that also deals great sustained damage in an area.Fury of the Mountain leaves behind fissures that can pulse when hit by Shockwave Totem’s attack. These pulses deal damage and generate Rage.Shockwave Totem can be placed while in Bear form!Overabundance II and Urgent Totems III allow for very fast placement of two totems to pulse Fissures very quickly.Link Kaom’s Madness Support to Fury of the Mountain as soon as you can obtain one. This lets you place max fissures in just three attacks, giving more time to use other skills and making clearing smoother. Make sure you drop Splitting Fissures from the passive tree after you get this support!From Act 3 the Rampage skill becomes available, which replaces Furious Slam.Fury of the Mountain and Shockwave Totem become your main clear, making Furious Slam unnecessary. Use Rampage while fully buffed and at full Rage to clear quickly through packs or finish off a stunned boss. Rampage rapidly triggers Fissures and Volcano. It also does excellent single target damage itself, especially against larger bosses!Rampage a tight circle around the boss for maximum damage and safety — most bosses have trouble targeting you if you do this.Shaman provides the Apocalypse spell from it’s Bringer of the Apocalypse node. This buff automatically bombards enemies with Meteors, Ice shards and Lightning Strikes.Glory to activate this skill is gained in this build by Igniting enemies — which happens frequently due to the large amounts of fire damage being dealt.The ultimate Bear form skill is Walking Calamity. This skill is similar to Apocalypse, but is a purely fire-based meteor storm dealing attack damage.Glory is gained for Calamity by generating Rage when at max Rage. Fury of the Mountain with Rage on hit generates Rage rapidly to power this up. Ferocious Roar also generates Rage rapidly.Activate both of these skills, followed by Savage Fury and then Rampage for ultimate devastation of both bosses and packs of monsters!
Thunderstorm can be used in place of Volcano at any point, but it really comes together once you swap to Thunderstorm at endgame.
When used on any tough enemy — like Rares or Bosses — this skill applies Shock and a very high effectiveness Exposure effect.It’s long duration and large area of effect with Expand make it super easy to pre-place and use in tough fights.Shock Conduction II guarantees Shock on Drenched targets (applied by Thunderstorm itself).Commiserate Support removes Shock from you as an added bonus!
This is a very effective way to boost bossing damage in the Endgame. As an added bonus, you can set the granted skill Heart of Ice to your Spellcaster Weapon Set with Clarity II and Slow Potency supports for a nice little bonus while in Human Form!
Shapeshift Druid Skill Progression
Use the arrows to navigate. Add Quality to Rampage and Fury of the Mountain First!
While leveling your Shapeshift Druid use your first Gemcutter’s Prism drops to add Quality to Rampage first. The quality bonus extends the time before Rage starts to be consumed by the skill, which makes it much more usable in short bursts while clearing.
The next priority skill is Fury of the Mountain, which adds additional Rage per hit. This makes generating max rage much faster. After those two main skills, Walking Calamity is your third best option.
This rotation is for maximum single target damage against major bosses. Skip some preparation steps like Flame Wall and Frost Bomb on easier enemies.
Place Shockwave Totem first next to the enemy, as it has the longest duration and can help hold enemies in place.Place a Volcano with a Flame Wall right on top of it, ideally near your Shockwave Totem and close to the enemy.Frost Bomb strips the resistances of enemies, so place it on top of tougher bosses or enemies to amplify damage.Pounce on the target to apply your Mark (increasing the damage they take), and to activate leech from the Mark of Siphoning support for mana sustain.Maul the enemy at least 2 times to generate enough Rage to follow up with Furious Slam. Continue the Maul and Slam combo until your Shockwave Totem and Volcano expires, or until the boss forces you to move. Engage by pre-placing the Shockwave Totem, Volcano and Flame Walls — all on top of each other and the boss.Pounce on the enemy to Mark and enable leech from Mark of Siphoning.Use Fury of the Mountain at least three times to generate Rage and place fissures. Slam with Furious Slam whenever you have enough Rage — look for the glowing red runes on the back of the bear! Pre-place Volcano and Flame Wall on the enemy.Place two Shockwave Totems in the same area (thanks to the Overabundance II support).Repeatedly use Fury of the Mountain to DPS the boss and place many Fissures. When the boss is stunned (or you see another opening), use Rampage. Circle around the boss as closely as you can, dealing very high damage with the shockwaves and frequent Fissure pulses. Use Maul (Act 1) or Fury of the Mountain (Act 2+) to generate Rage.Use empowered Furious Slam when you have 10+ Rage on larger packs or tougher enemies. You can easily tell when you have enough Rage as your Bear form back will be glowing with red runes.Supplement by pre-placing Volcano and Shockwave Totem for tougher Rare monsters or dangerous packs. Similarly, if you need to retreat and do some ranged DPS you can use these skills in human form while maintaining your distance. Place one to two Shockwave Totems and Fury of the Mountain several times.Use Pounce to Mark rare enemies for leech and to generate wolves. When your Rage is full you can also use Rampage to clear areas quickly. Use Apocalypse and Walking Calamity whenever they are charged on bosses.You can alternate their use while clearing, maximizing the time that one of the skills is active.Use both before going into a long Rampage.Walking Calamity is generated by maintaining max Rage. Fury of the Mountain and Ferocious Roar are excellent for doing this quickly.Ferocious Roar will trigger the Ancestral Cry buff when it’s fully charged, turning you into an Avatar of Kaom in Bear form.Charged by igniting targets with your various fire skills.When not charged, you can use Ferocious Roar to generate Rage on large groups or Rares and bosses. This helps generate Glory for Walking Calamity faster.The ideal time to activate your Ancestral Cry buff is right before a Rampage or as you are using Fury of the Mountain on a boss.
After swapping to Whispering Ice and Thunderstorm the rotation for bossing changes only slightly
Pre-place Thunderstorm where you expect to fight the boss. It has a very long duration in this build and a large AoE — so this is very forgiving.Slam three Fury of the Mountain with Kaom’s Madness to quickly reach max Fissure count. You can even preplace these as the Fissure pulses will immediately begin damaging the boss (and generating buffs like Rage).Place 2x Shockwave Totems, to begin Fissure pulsing. Ideally place these near the boss, but anywhere on your Fissures is fine.Activate Apocalypse, followed by Walking Calamity.It only takes moments for Fury of the Mountain Fissures to generate max Rage and charge Calamity. Thunderstorm also charges Apocalypse very quickly. If you have some down time, use Pounce here to Mark the boss and replace Totems or Fissures as needed.Once your buffs are online, Pounce on the boss to Mark it if you haven’t already. When safe to do so prepare to Rampage.Ferocious Roar first to activate the Ancestral Cry buff.Use Savage Fury to give yourself a huge damage and speed buff.Then Rampage, circling the boss as tightly as you can.
The Savage Fury Spirit buff is charged by dealing melee damage in your shapeshifted forms and should be activated whenever you want a boost of speed or damage in Bear form. This is often as you go to use Fury of the Mountain or Rampage. It’s also great to boost your speed when Pouncing and running around in Wolf form. Ensure that you have used all spells first, as swapping to human form ends the buff!
While you want to level every skill in this build as high as you can to maintain their effectiveness, the following are the most important.
Fury of the Mountain is most important overall.Furious Slam is most important in Act 1.Volcano & Shockwave Totem.Walking Calamity.Rampage.
Your Spirit skill gems provide only small buffs for leveling, making them a low priority.
Early Access – The Last of the Druids
Shapeshift Druid Leveling Guide
Learn how to complete the Trial of the Sekhemas and Trial of Chaos to earn your first 2 Ascensions with our Ascension Guide!
Shaman is the Ascendancy of choice for leveling a Shapeshift Druid build. It’s also an excellent Ascendancy for a variety of endgame builds (or you can respec to Oracle if you plan on changing builds at endgame).
Turning of the Seasons provides a large boost to elemental damage and gives enemies Exposure, lowering their Resistances. Once you have this node you can drop Frost Bomb as its effect becomes somewhat redundant.Bringer of the Apocalypse grants you the powerful Apocalypse Glory spell — boosting your clearspeed and bossing DPS.Druidic Champion and the minor node before it enhance your damage scaling, making Rage investment apply to spells.Reactive Growth is one of the most powerful defensive layers against elemental damage in the game. It gives a consistent reduction to all elemental damage taken (even damage over time), and also gives a reactive layer against the elemental damage you are currently taking from hits.Effects like Molten Being become extra valuable, allowing you apply your new elemental mitigation to a portion of physical damage too.Druid’s excellent support for elemental Armor, with nodes like Prism Guard layer on top of this elemental protection very nicely. Shapeshift Druid Shaman Ascendancy ProgressionEarly Access – The Last of the Druids
Shapeshift Druid Leveling Guide
Shapeshift Druid Shaman Passive Skill Tree
Click the arrows to open the full tree in a new tab.For the attribute nodes take enough Intelligence and Strength to meet gear, skill gem and support gem requirements, then use the rest on Strength for more life. You may need to take two or three Dexterity travel nodes for support gems.You can use your Gold at the Hooded one or Doryani to respec and change your Attributes if a new skill or gear upgrade leaves you unable to use your skills/items.Rush to Bestial Rage for additional Rage on hit.Mystical Rage gives excellent spell damage scaling and your a next priority. Pick up Lasting Incantations and Wasting Casts with your weapon set passives for your spellcaster set. In general, duration and debuff effects are high priority for spells.Pay attention to your weapon set passives and use them as much as possible.Shapeshift, attack or melee focused passives want to be on your Talisman weapon set.Spell specific buffs want to be on your spellcaster weapon set. For simplicity it’s a good idea to maintain the default weapon setup the game starts you with: Weapon Set 1 is your spellcaster weapon (Staff), and Weapon Set 2 is your Talisman.Take poe2-passive id=20251]Splitting Ground[/poe2-passive] while leveling (ideally on your Shapeshift Weapon Set) as soon as possible, to enhance both your DPS and your Rage generation. It makes sense to put Splitting Ground on your Talisman weapon set passives, but the minor Attack Area nodes before it are actually generic Area of Effect, and can be allocated with regular passives to benefit both your spells and attacks!Later, Kaom’s Madness Support can be linked to Fury of the Mountain — and the Splitting Ground cluster dropped from the tree. Kaom’s Madness causes you to easily place all 12 Fissures in just 3 attacks, making this cluster redundant.Until you get a 1-2% Mana on Kill Sapphire Jewel you can supplement your Mana recovery with passives like Sturdy Mind in the Druid area. An upgraded Mana Flask and Mark of Siphoning on Pounce typically cover things comfortably.As you progress through the Endgame consider swapping to the Whispering Ice + Thunderstorm Variant for more single target damage and a smoother playstyle on high end bosses! Passive tree respeccing is minimal for this swap — swap enough STR nodes over to INT to equip the Whispering Ice staff. Small changes like Sigil of Lightning let you get even more benefit from Shocking bosses with Thunderstorm.Leave the self-ignite strategy until you have a total of 100% “reduced ignite magnitude on you”. The easiest way to get this is by anointing the Heatproof node on your Amulet.Without 100% reduced ignite magnitude you will deal large amounts fire damage to yourself from the reflected ignites of heavier hitting skills like Apocalypse and Calamity.This combination of Self Immolation, Molten Carapace, and Heatproof provide you with immunity to Ignite damage, 2% max Fire Resistance, and 50% increased Armour and Fire Damage.Early Access – The Last of the Druids
Shapeshift Druid Leveling Guide
Early Access – The Last of the Druids
Shapeshift Druid Leveling Guide
Your Staff should have +skill levels to Fire skills, increased fire damage and increased spell damage. Increased cast speed and Flammability magnitude are good quality of life stats but less important for DPS.Your Talisman should have as high Physical and/or Fire DPS as possible. Attack speed is also excellent, contributing to DPS — also making Bear form much faster and safer to play. Remember that weapon DPS is the foundation of attack skills. It is the minimum + the maximum raw damage, divided by 2 and then multiplied by the attacks per second.When searching trade for Talismans you can add a NOT filter that includes added Cold and Lightning damage. Then sort by total DPS. This will give you the highest combined Physical and/or Fire damage weapons.Talisman +skill levels to attacks are a large DPS increase too, but can cause mana issues if not backed up with high raw damage too.On Rings and Gloves prioritize any and all added flat damage (but especially Fire and Physical).Attack Speed and +Skill levels on other pieces of gear are excellent boosts.Mana leech on at least one piece of gear is essential to ensure you don’t run out of mana. Get it on your Ring, Gloves or Weapon. Life Leech is nice to have but not as important.Sufficient +#% to Fire, Cold and Lightning Resistance to cap your Resistances.As always maximum Life and Strength are vitally important for Life-based builds.Movement Speed on boots may not seem like a defensive stat, but being able to move faster is one of the strongest defensives in the game.Armor & Armor applies to elemental damage.Energy Shield.A strong Life Flask. Ensure you keep upgrading your Life Flask whenever possible, prioritizing recovery speed and flask charge generation.Long-term, aim to get additional Fire Resistance over the 75% cap. This is to give room for your Maximum Fire Resistance buffs to take effect.As you get to endgame and cap your Elemental Resistances start to add some Chaos Resistance to your gear as you can afford it. While the build has good physical and elemental mitigation, Chaos damage becomes more dangerous as you progress through map tiers.
Start to look for more appropriate Jewels as you approach endgame. While you only need two Jewels they can have a large impact on your character — especially 1-2% Mana on Kill. Here’s a list of the highest priority modifiers to get:
1-2% Mana on Kill: Just one of these stats will mean you rarely ever have to use your Mana Flask while clearing packs. With Mark of Siphoning II providing excellent mana sustain on bosses — that’s mana solved. If you get only 1 modifier on Jewels, make it this one.1-2% Life on Kill: This modifier is very powerful for topping up your Life as you clear. Having a full Life pool also means your Energy Shield has a chance to recharge with Zealot’s Oath too.5-15% Increased Elemental Damage / 5-15% Increased Fire Damage: These are the better damage modifiers as they apply to both your spells and attacks equally (while others like Damage While Shapeshifted only work for part of your build). Try to get above 10% for these modifiers to be worthwhile though.Gain 1 Rage on Melee Hit: Faster Rage gain is great in this build, and global Rage on Hit like this works for Pounce as well as Fury of the Mountain.5-10% Increased Skill Effect Duration: This is excellent for increasing the duration of both your Spells like Volcano and Apocalypse, but also Walking Calamity, Savage Fury and many other things in this build!10-20% increased Armour: Armour is a powerful defensive layer in this build, and a high roll of this on a Jewel is almost 2 passives of value. 2-4% increased Skill Speed while Shapeshifted: While it’s unfortunately a fairly low total value, any and all Skill Speed increases make Bear form more fun and powerful.
If you’re struggling to survive, or want to learn more about damage and defenses in Path of Exile 2 check out these additional resources:
Early Access – The Last of the Druids
Shapeshift Druid Leveling Guide
Your Talisman is your most important item, keep it as upgraded as possible by gambling, crafting and with Runes.Try to get 10% movement speed boots in Act 1 and upgrade every Act if possible until you have at least 20% movement speed. At endgame get 30% movement speed as soon as possible.From Act 3 onwards ensure you have at Mana Leech on at least one piece of gear.Prioritize Life and Resistances on your Chest, Helm and Body Armour. Armour applies to elemental damage is also very powerful, though it requires your gear also have decent Armour values.Prioritize raw damage and speed stats on Gloves and Rings.The Amulet can be either damage, life and resistances, or for solving issues with Attributes.In Act 1 prioritize a Cold Resistance Charm for Count Ogham. After that, use Charms to resist Stun, Freeze and slows.Keep your flasks up to date! Upgrade every tier and always craft them with Orb of Transmutation and Orb of Augmentation. Throw away any Mana flasks that drain your Life. Shapeshift Druid Campaign Gear
Recommended Unique: Goregirdle
From Level 25 onwards the Unique Belt Goregirdle is available. It’s typically quite cheap and common to trade for and is extremely effective at boosting defenses in this build (though it is completely optional). When you get to Endgame, try and incorporate it into your build as soon as possible — while keeping your elemental Resistances capped.Its “Defend with 200% of Armour” modifier applies to both Physical and Elemental damage taken thanks to “Armour Also Applies to Elemental Damage” modifiers such as the buff provided by Bear Form.The penalty only applies to Physical damage mitigation, not Elemental!Even if your character sheet says 50% mitigation from Armour, larger hits will still be mitigated more effectively.Cloak of Flame is also an option to significantly improve Physical mitigation by converting it to Fire damage — synergizing nicely with Goregirdle and your Max Fire Resistance increases. The biggest drawback is a loss of overall Armour and more pressure on the rest of your gear for Resistances.
Swapping to The Whispering Ice + Thunderstorm allows you to Shock bosses reliably with Shock Conduction II — while lowering their resistances with Whispering Ice’s powerful Exposure effect.
Obtain a The Whispering Ice:The lower the Intelligence requirement, the better. The amount varies based on the Item Level of the Staff.Prioritize getting the highest Exposure effect possible.Swap some Strength Attribute Passives over to Intelligence to meet requirements. Alternatively, grab an item like an Amulet with Intelligence on it. Socket it with Greater Glacial Runes for Chill and Freeze chance.Tip: You can use any item with Intelligence on it to temporarily boost your Attributes to equip Whispering Ice, then unequip it afterwards. The % Increased Intelligence modifier can then help cover Whispering Ice’s own INT requirements!Ignore Passive Tree warnings about low INT when on your Talisman weapon set, as long as you have enough INT on your Staff weapon set it doesn’t have any impact.Early Access – The Last of the Druids
Shapeshift Druid Leveling Guide
The Bear Form Shapeshifting Druid style works extremely well at all levels of Endgame and at a variety of gearing levels. Continuing on with the Apocalypse + Calamity + Rampage strategy approach this leveling guide outlines is a great choice. It is also relatively easy to transition to another style — or to work towards a higher-budget aspirational setup. Here’s some strategies for continuing on into endgame.
Follow this build guides strategy using the endgame passive tree and gear sets, along with the included variants.Take note of the The Whispering Ice + Thunderstorm strategy for effective Tier 15+ bossing.Drop the spellcaster side of the build and focus on Walking Calamity, such as in our Walking Calamity Shaman Build Guide here.Work towards a high budget Demon Bear build with Fury of the King, such as in our Demon Shaman Build Guide here.Explore a freeze-focused Wolf Form or Lightning-damage Wyvern setup. Early Access – The Last of the Druids
Shapeshift Druid Leveling Guide
The first and easiest thing to do is to upgrade your Mana flask. Make sure it’s the current highest level flask available (upgrading via NPC vendors in town is easiest). Also craft it, with increased Amount recovered being the most impactful stat. After that, attempt to get Mana Leech on a Ring, your Gloves or your Talisman. If you’re still having issues then it is likely a DPS problem, which means you need to upgrade your weapon — especially if you are relying on a weapon with low DPS but high +skill levels, which increases mana costs!For endgame, a 1-2% Mana on Kill Sapphire Jewel covers mana costs while clearing (with Pounce and Mark of Siphoning solving boss sustain).
Yes! Simplifying the playstyle always comes at a cost of raw DPS (especially for bosses), but is completely valid to improve your comfort when playing. Here’s the least important things you can cut from the build to simplify:
Frost Bomb in Act 1 is supplemental, cut it entirely to simply Act 1.Flame Wall is also supplemental DPS and can be cut entirely.Take Herald of Ash instead of Savage Fury for your first Spirit Gem (or swap to it when you can). Herald of Ash doesn’t help against bosses but boosts clear speed and doesn’t require pressing a button to activate.
Also keep in mind that you don’t have to do your full DPS rotation all the time, even in boss fights! The full rotation is designed for boss monologues and ideal conditions where you have time. If you want to simplify even further, you can cut Volcano and Apocalypse and run a pure attack Bear form version too!
If you get Spirit on a Body Armour or Amulet you may end up with spare Spirit. With this you can:
Run both Savage Fury and Herald of Ash together.Add Barkskin for a defensive boost.Add Vitality I or even Vitality II.Add Clarity I, Mysticism I or Mysticism I.
This build requires high Strength and Intelligence at all times for Skills, Gear and Supports. Use town NPCs to respec your passive travel nodes as needed to adjust. Also supplement with any Attributes on gear, especially Amulets. Even if you get Strength on gear when you need Intelligence, this allows you to respec one or two passives to fix the problem.
Early Access – The Last of the Druids
Shapeshift Druid Leveling Guide
 Early Access – The Last of the Druids
Shapeshift Druid Leveling Guide
Shapeshift Druid gives you a powerful and varied campaign experience combining Human spells, Werewolf mobility, and Bear form survivability and damage.Use the powerful combination of Volcano combined with Furious Slam, Shockwave Totems, and Fury of the Mountain for extreme damage against bosses.The Shaman Ascendancy grants the Apocalypse spell, which can be combined with the Bear form’s Walking Calamity to destroy everything on screen in elemental mayhem.Enjoy simple gearing with no specific Unique items required. High raw damage Talismans and Life and Resistance gear is all you need.Mana issues are rare, and easily solved with a single Mana Leech stat on a Ring.Benefit from armour scaling that affects both physical and elemental damage taken for a very powerful defensive setup.Blast Path of Exile 2’s Campaign with the most varied and unique leveling build and class experience to date!
Written by: ZIGGYD
Content Reviewed by: CrouchingTuna, Cptn Garbage
Language Reviewed by: Tenkiei
Added Endgame Whispering Ice + Thunderstorm Exposure / Shock setup for boosted bossing DPS. Thanks to Palsteron for the idea!
– Passive tree variant.
– Skill loadout variant.
– Gearing variant.
– Skill rotation.
Added an endgame options section with some advice and links to similar builds.
Improved various other sections with more details.
– Added Goregirdle and improved gearing notes for defenses.
– Tweaks to the passive tree.
– Arcane Surge removed as it is unneeded at endgame once you get a % mana gained on kill Jewel. The points have been distributed towards other clusters.
– Dropped Splitting Ground at endgame, due to using Kaom’s Madness on Fury of the Mountain.
Minor passive tree tweaks. Further testing and optimization of passive tree is ongoing, pin this post to be notified of future updates!
– Added note about what skill to quality first.
– Updated notes on Talisman modifiers, as Fire damage is quite solid.
– Improved and expanded the defensive gearing notes.
– Added Jewel Modifiers section!