
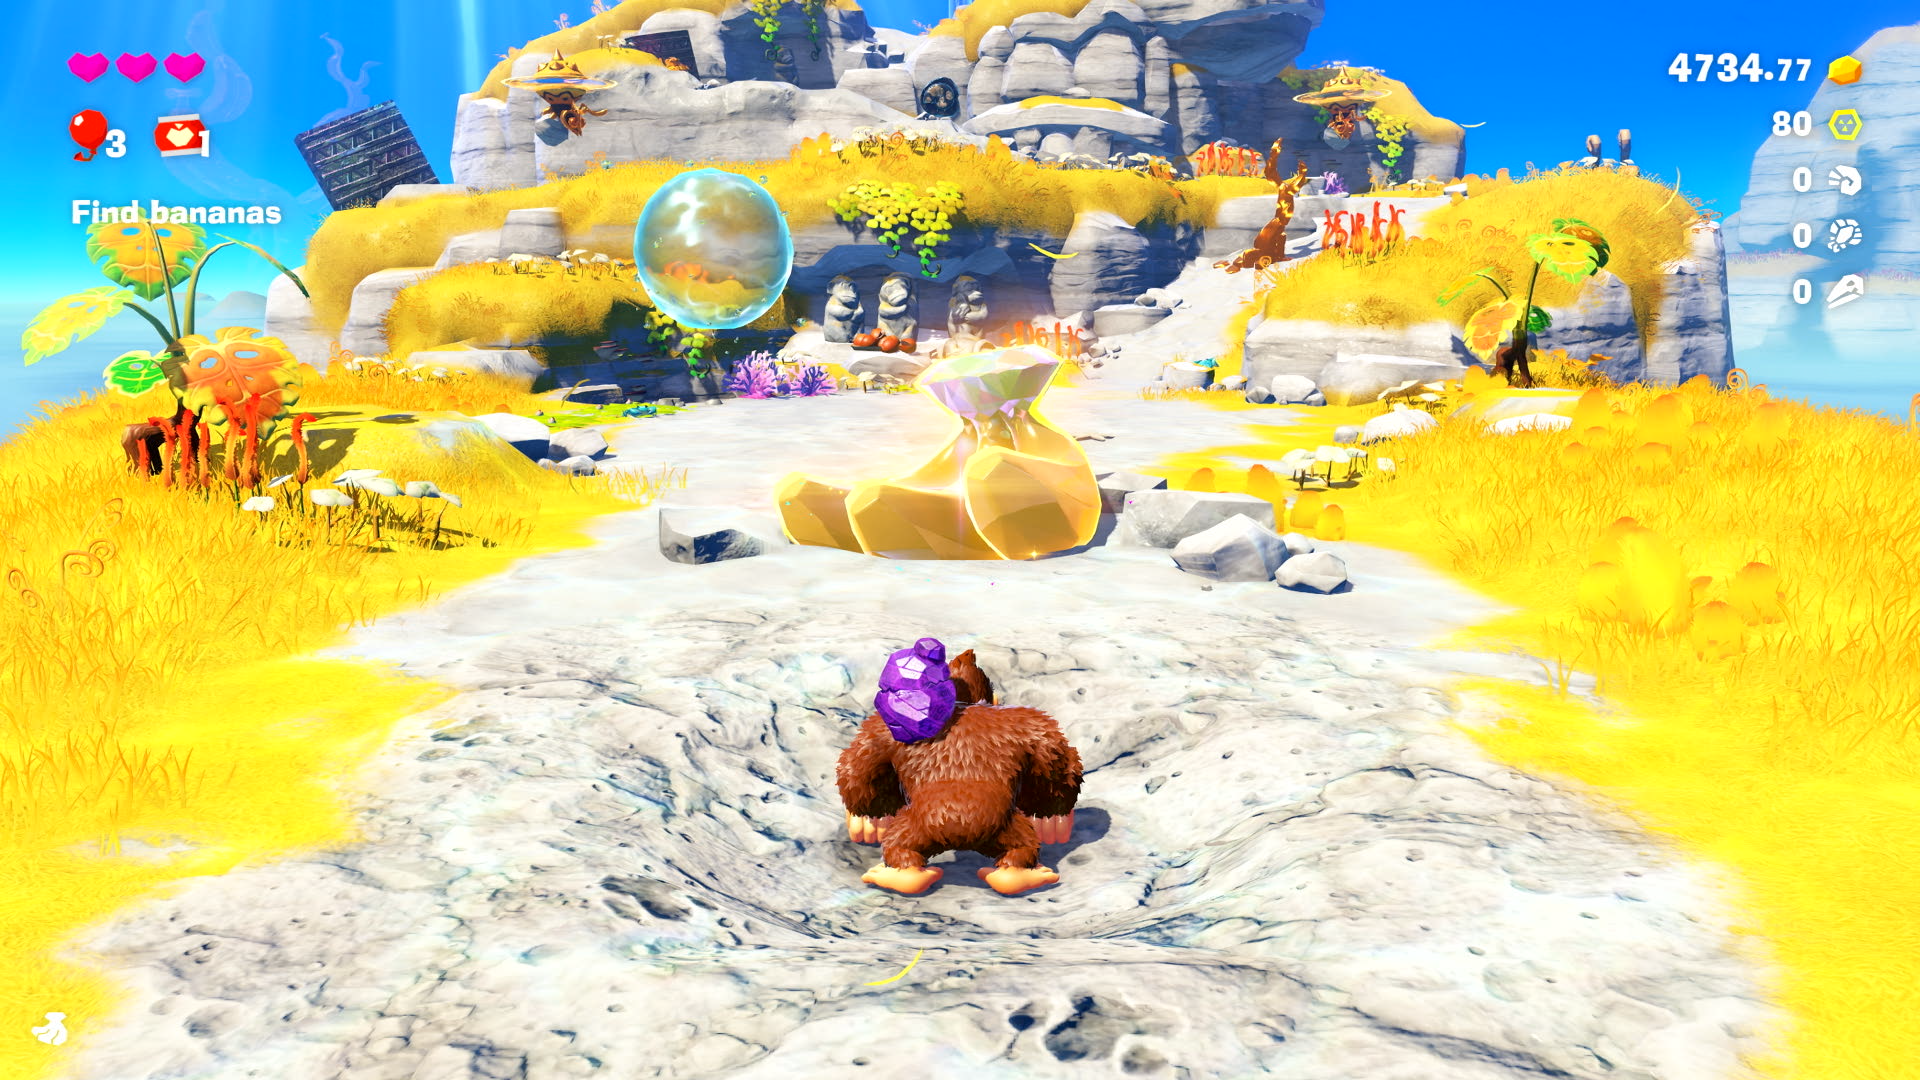
After digging through the Ingot Isle Cave-In and teaming up with a singing Odd Rock, Donkey Kong dives deeper into the earth in search of stolen Banandium Gems, leading them to the Lagoon Layer. This walkthrough will guide you through the main story of meeting the inhabitants and Elder of Lagoon Layer to unlock a Bananza Skill, as well as pointing out collectible Banandium Gems and Fossils along the way.
Ape Cape (Layer 100)

Diving down into the Lagoon Layer from Ingot Isle, you’ll be met with an entire new world to explore in the form of a large rocky island surrounded by a vast lagoon. There’s tons more to do here than in the tutorial area where you started – not least of which is the ability to collect a LOT of Banandium Gems.
Speaking of which, you’ll find yourself landing in the Ape Cape region, where the 3-bunch Banandium Gem you uncovered above has landed. This will become something of a theme as you unlock new layers, as you’ll need to chase the Banandium Gem down to collect it as part of the new layer’s first Banana.
Note that the banana bunches will count as 1 Banandium Gem in terms of completion, but will offer multiple points toward your next Skill, which you should earn from getting this Banana. Skills in Donkey Kong Bananza are pretty straightforward, but well worth investing in. At this point, if you’re unsure of your combat abilities, you can invest in a Health Upgrade, otherwise, we’d recommend the Better Collecting to increase the range of your Hand Slap.
While in the Lagoon Layer (and most layers thereafter) you’re free to tear up as much terrain as you like, whether it’s for investigating suspicious rock walls and tunnels, or just digging straight into the earth in search of treasure. You can view the current layout in your map by pressing the – Button, and if you ever need to reset the terrain, you can do so in the map by pressing the + Button.
Your first main objective in the Lagoon Layer is to simply find more bananas as you explore, and that starts with getting a good vantage point of this layer.
Head up the main path ahead of you, and watch out for a new type of enemy. These foes flutter in place like bees, and will toss rocks at you when you draw near. Luckily, you can quickly run up and punch them while jumping, or simply grab a chunk and toss one at them before they can toss their own.
Just past the first enemy, look along the rock walls ahead to spot your first secondary collectible: a fossil. Fossils are to Bananza what Purple Coins were to Mario Odyssey – they are the current layer’s currency, and can be traded in later for different outfits and cosmetics. Simply run up and smash it on the wall to dislodge it and add 1 of 61 Ammonite Fossils to your collection.
Nearby, you’ll likely notice a strange slab of rock with a sheen to it. This is Concrete, and can’t be destroyed with punches alone. However, by grabbing a chunk of stone, you can bash it apart with several swings.
Be sure to also drop down to the ledge below the concrete slab, and look for a large flat wall in a cave to find another Ammonite Fossil behind it.
Back at the top of the path past the first fossil, you’ll meet some new faces. These Salvager Monkeys are different from your miner friends, and aren’t exactly thrilled at outsiders, and will ask you to move on.
Reservoir Bank
Your next stop is heading down the hill toward a large waterfall from the sky landing in a reservoir. At the bottom of the hill is a Checkpoint you can unlock, and it’s surrounded by stalks of Gold Ore you can smash apart.
Just past the checkpoint, you can spot a Salvager Monkey magnet fishing over a tiny pool of water that hides another Ammonite Fossil (he won’t mind if you grab it).
Past him, you’ll find two more Salvager Monkeys talking about a strange rock cube called Boom Rock. You’ll be able to tear chunks of it to create a Boom Rock, and toss to create explosions that obliterate enemies and terrain alike – even concrete!
Try it out by taking a chunk and aiming at the wall full of Gold Ore by holding ZR and then letting go. Anything the explosion hits will add Gold to your reserves even if you didn’t physically collect it!
Note that while aiming a chunk with ZR, you’ll be able to see the type of terrain you’re aiming at, which can give you a good indication of how tough some material can get.
Take a chunk with you down the path and try tossing it at the flying enemy, and you’ll likely explode it and the Ammonite Fossil on the wall behind it!
Up ahead, toss more of the Boom Rocks at the concrete blocking your path to find a sealed tunnel wall that hides your next objective.
Before going in, you may want to inspect the small strange platform to the right: Use a ground pound to enter the Lagoon Layer Battle Challenge 1 – a small challenge room that lets you defeat enemies under a time limit to earn more Banandium Gems!
Back at the concrete tunnel wall, blow it open with a Boom Rock to find a tunnel with more revolving concrete plates you’ll need to blast through to get to the other side. As you do, watch the spinning slabs to find another Ammonite Fossil embedded in one so you can collect it with a well-placed Boom Rock.
On the other side of the moving slabs, look up to the right for a concrete slab embedded in the wall on the right, with glowing gold sparking coming out of it. Head back to grab more Boom Rock so you can detonate the slab, and you’ll find it’s hiding an alcove with a Banandium Gem to collect!
Exiting the tunnel, you’ll find another Salvager Monkey. While he doesn’t really trust you, he is worried about a stake that appeared and stopped water from flowing to the lower layers. It’s the same stake that was atop Ingot Isle, so you should have a good idea of what happens next.
Head down the path by tossing rocks at the floating enemies (and look for an Ammonite Fossil along the right wall, and another behind a small wall of concrete) until you enter the pool of water to come face to face with another Crockoid.
Unlike the one you fought previously, this one is encased in extra sturdy Concrete. Punches won’t cut it here, but luckily he’s standing next to a cube of Boom Rock that you can grab and then launch into its face!
If you take damage, note that there’s a giant apple encased in some rock nearby that you can punch to restore your health.
Once exposed, give the gold skeleton a beatdown to take its key, unlocking the stake. Give it a thrashing too, and the hole to Sublayer 101 will be open!
Be sure to use some of that Boom Rock on a slab of concrete along the nearby wall to collect another Ammonite Fossil, and it will also open up a cave full of more Boom Rocks, Gold Ore, and three extra Ammonite Fossils in the walls and below the dirt!
From here you’re free to keep exploring this part of the Lagoon Layer (we recommend at least climbing up above the reservoir to the mouth of a large statue, and knock open its teeth to find a Banandium Gem).
Otherwise, dive down into the next area after the Banandium Bunch to continue your quest.
Salvager’s Landing (Sublayer 101)
You’ll land in this new area on top of a larger Blast Barrel, which you can Dive Punch if you ever want to quickly return to Sublayer 100. For now, be sure to shatter the nearby Banandium Gem to earn three more points toward your next Skill.
From this new landing, you’ll find yourself close to a small village, but before heading over, you may want to look over to the left to find a lower platform with an Ammonite Fossil and a small metal bridge leading to another Battle Challenge with a Bananadium Gem reward.
There’s also a Salvager Monkey on a hill nearby next to a Treasure Chest. This one is a freebie, but you’ll find a lot more simply by digging up earth, where chests have a random chance to appear. Opening them can give you all sorts of things – from more Gold, to powerups and even Treasure Maps that mark the location of nearby Fossils and possibly even Banandium Gems!
Up ahead, you’ll find that Salvager’s Landing is a village with a lot to take in, and you can talk to a Salvager Monkey along the metal bridge that mentions all their bananas were stolen too!
There’s a strange “ruin” near the village that looks like the entrance to a battle room, but is triangle-shaped and has 3 Banana Icons, meaning you can find up to 3 Banandium Gems by completing the Challenge Course inside!
Over to the left of the ruins, you can meet a Li’l Eelevator. These guys act as fast traveling for you, and will allow you to “T’eeleport” to certain areas and checkpoints you’ve uncovered in a particular layer. However, moving between layers will require something a bit bigger you’ll find out more on later.
Just past the Li’l Eelevator, you can find a floating block of an odd shifty substance that takes on whatever property it interacts with. Test it by tossing a stone chunk at it to create a platform, allowing you to reach an Anomalocaris Fossil.
Along the lower part of the village, you can also find the Style Shop across from an Ammonite Fossil in a pool of water. Here you can trade in the fossils you find on the current layer to purchase a variety of clothing and fur color dyes for DK, and eventually your companion:
Lagoon Layer Style Shop
Name
Effect
Cost
Red Britches
Increases swimming speed by 10%
1 Ammonite Fossil
Swimmin’ Britches (Level 1)
Increases swimming speed by 15%
5 Ammonite Fossils
Swimmin’ Britches (Level 2)
Swimmin’ Britches (Level 3)
Treasure Tie (Level 1)
Increases chance a treasure chest will appear from destroying terrain by 10%
1 Anomalocaris Fossil
Treasure Tie (Level 2)
Increases chance a treasure chest will appear from destroying terrain by 20%
3 Anomalocaris Fossils
Treasure Tie (Level 3)
1 Whale Fossil
Leaf-Green Furt
Gives DK’s fur a Green hue
5 Ammonite Fossils
Aqua-Blue Fur
Gives DK’s fur a Blue hue
10 Ammonite Fossils
Cyan Lagoon Vest (Level 1)
Expands your sonar range during a Bananza by 20%
5 Ammonite Fossils
Cyan Lagoon Vest (Level 2)
Expands your sonar range during a Bananza by 60%
10 Ammonite Fossils
Cyan Lagoon Vest (Level 3)
Lilac Lagoon Vest
Expands your sonar range during a Bananza by 20%
5 Ammonite Fossils
Green Lagoon Vest
Expands your sonar range during a Bananza by 20%
10 Ammonite Fossils
Clothing options can provide good benefits to DK as you explore, and certain clothing can be upgraded to higher tiers the more fossils you collect. We highly recommend getting the Treasure Tie if you want help tracking down more collectibles as you explore!
Note that a nearby Salvager Monkey by the ruins with a banana icon over him will try and dare you into finding a hidden Bananidum Gem somewhere under the village.
The easiest way to find it is by looking under the huts to the right of the Style Shop, where you can find an opening into a cavern below where the Banandium Gem awaits you!
Off to the left of the Style Shop, you can find another Salvager Monkey with a quest update for you: the village’s water storage tank has been plugged up by 3 purple seals connected to mysterious concrete pillars, and will need to be opened if the water can be raised so you can visit the nearby Kong Elder.
Before you head off, note that the village also has a strange looking bed you can rest in to recover your health. Even better — you’ll get a temporary yellow heart as a bonus for sleeping!
The three plugs are best taken care of in a specific order as the water level rises, so we’ll start with the one indicated by talking to the Salvager Monkey. Cross the green metal bridge to leave the village and find two monkeys upset they can’t visit the Elder nearby. The other will indicate the nearby concrete pillar with no way to get across, but there is a long climbable stretch of metal you can use!
To the right, you can find a ledge to drop down to the base of this layer. There’s not much to do at the base, and it will soon be filled with water, so stick to your objective by looking for a trail of gold ore going up a metal plank you can climb.
As you climb, a few floating enemies will try to take aim at you with Boom Rocks. If you move fast they shouldn’t be a problem, but you can also grab some soil from the ground and toss it at them first before climbing to the top.
Once you reach the top, there’s one more floating enemy to worry about. Luckily, just off to the right is a slab of Boom Rock you can tear a chunk out of to defeat it.
Grab another chunk, and toss it at the concrete pillar to smash it to pieces. This will unplug the first of three seals, and raise the water level of this layer slightly.
The water isn’t high enough to reach the Elder yet, but a Salvager Monkey standing by where the concrete pillar used to be will give you your next heading – on the other side of the raised platform where the bridge is rising up to.
Hop down or swim across past the floating bridge to find a small island with red sand (and an Ammonite Fossil atop a pillar), and another monkey to speak with. He’ll indicate the second seal can be reached by taking the Orangu-Hang Highway, which will require a small detour back up to a higher layer.
To reach it, you’ll need to climb a long flat surface just beyond, but you’ll find the sides coated in slippery iron that cannot be climbed or destroyed. To go up, you’ll need to get past some moving concrete. Luckily, a few of the Antickoid enemies here keep Boom Rocks on their back. Smash them and throw the explosives to get rid of the concrete before you climb upwards.
At the top, you’ll be able to traverse the next section by jumping up to automatically grab hold of the mesh ceiling. DK is a fairly dextrose guy, and you’ll be able to move rapidly while climbing this way, and can still attack with Y to smash the beetles hanging around as you move to the other side.
Be sure to also demolish the mound of stone to the right as you climb through, and you’ll find an Ammonite Fossil embedded within.
Once you drop down on the other side of the mesh highway, be sure to punch the floating box to create a shortcut back down in case you fall.
There’s also two Ammonite Fossils hiding down below on a ledge, and a Banandium Gem to collect embedded in some Gold ore before you blast back to Sublayer 100.
Reservoir Hills (Sublayer 100)
Back in Sublayer 100, you’ll find yourself not far from the reservoir you originally dropped down. There’s an easy to spot central path here leading to the Reservoir Hills Checkpoint.
Just up to the left of it, there’s also another Battle Challenge Room you can unlock by singing if you want to get another quick Banandium Gem.
As you move through the canyon path, you’ll find not all is as it seems. Certain boulders and walls will reveal themselves as an illusion – formed of dozens of small octopus-like enemies called Peekaboopoids that will swarm you. If you let them grab on, they’ll start peeling away your health, so bash away until the area is clear of enemies before you move on.
When you reach the other side of the canyon, turn left to find an Ammonite Fossil in the wall, and then check the right to speak to a Salvager Monkey. He mentions something blocking the way down to the Orangu-Hang Highway, and by now you should have a pretty good idea what that might be.
To reach the blockage, you’ll need to cross a narrow walkway over a pool of water. The walkway is lined with concrete slabs, as well as floating enemies looking to lob stones at you. Luckily, there’s a giant cube of Boom Rock nearby you can use and return to as you forge a path to the other side of the water.
As you do, be sure to dive down into the pool and look under the bridge you crossed. There’s an Ammonite Fossil stashed below you can grab, plus another on some floating grass below the bridge!
Halfway along the bridge, you can also find a section of Boom Rock you can handslap to raise it upward, and toss it across the water at a giant DK statue head filled with concrete. This will open up an optional Bonus Stage filled with gold that you can break through in record time to get a ton of money!
The other side of the bridge ends with a large climbing section that’s blocked by slabs of concrete, meaning you’ll again have to blow open a path to climb all the way up.
You can do this by heading up to the left of the large structure, and fighting off the hordes of Peekaboopoids to find a Boom Rock you can extend and throw chunks at the nearby concrete walls blocking the path upwards.
Return to the climbing section and move fast to avoid more spawning hordes of Peekaboopoids until you reach the top.
Smash the stake, and you’ll be rewarded with a bunch of Banandium Gems as it rockets back down to Sublayer 101.
Orangu-Hang Highway (Sublayer 101)
Now that you’re back on the lower Sublayer, collect your Banandium Gem and be sure to knock down another floating box with a rope for easy access back to this point.
The nearby Salvager Monkey will point the way toward the second concrete pillar, which is across another ceiling climbing section.
This particular section will see the return of the burrowing enemies, but this time you’ll need to dodge them on the ceiling, so don’t stay still or move predictably to get the enemy to burst out before you punch it from the side.
Once the enemy is gone, you can take your time waiting for the moving ceiling sections to align before reaching the other platform.
Here you’ll find the concrete pillar embedded a little out of reach — but the key lies within the other burrowing enemy here made entirely of Boom Rock. Bait it into trying to burst out in a long pillar, then climb up after it to punch it away.
You can now use the Boom Rock pillar it created to heave a chunk through the air, and destroy the second plug.
At this point, the water will have risen enough that the bridge to the Elder is now traversible!
Head back down below to Salvager’s Landing, and cross the restored bridge to the Elder’s Court – which comes complete with a checkpoint and a Banandium Gem for your troubles!
Elder Court
Before you go about destroying the last concrete pillar, you should take the time to speak with the Kong Elder by stepping up to the microphone.
The Elder will ask what you seek, and regardless of your answer, he’ll offer to help by powering you up with the power of the Bananza. However, to do so, you’ll need to find his Ancient Record and bring it back. Luckily, it isn’t too far away, but it will require one quick task.
The Ancient Record is located just off to the left of the Elder Court, but it’s on a small platform with a bridge that doesn’t quite reach.
This brings us back to destroying that final concrete pillar. Look to the left of where the Ancient Record sits, and you’ll find a small pathway up to a smaller purple column powering the final plug. The path is littered with more Peekaboopoids you’ll need to swat away – many of which are disguised as Boom Rocks.
One of the Boom Rock pillars however is the real deal, so grab a chunk of it and toss it at the nearby column to fully restore the water level in this layer
Head back across the newly raised bridge to reach the platform with the Ancient Record. You’ll find it’s nigh indestructible, and can even be used to bash apart the slabs of concrete nearby that hold an Ammonite Fossil.
Even better, you can tap ZL to spin on the record and slide all the way back to the Elder. If for any reason you lose sight of the Ancient Record, don’t worry, it will appear back in its original resting spot.
When you return to the Elder, place it upon the Eternatable to begin a cutscene.
You’ll be prompted to provide a drumbeat as DK (hold L and R), freeing the Odd Rock from its curse, and revealing the true occupant – a young Pauline!
Once again, you’ll be asked to encourage Pauline to sing by pulling up a dreambeat, which will help her unlock her true talents, and transform you into the Kong Bananza!
In this new form, you’ll have a limited amount of time to unleash some supercharged moves! Just by default, your attacks will hit harder and break apart stone and other terrain at a much faster rate – including Concrete!
When you’re given the opportunity for a test ride, you’ll find that you can also hold the attack button to charge up a powerful punch, sending shockwaves out in front of you to demolish more terrain and enemies alike!
Bananzas don’t last forever, but the good news is you can quickly refill your meter by acquiring Gold (or Banandium Chips). The Elder will toss a bunch your way, and once your meter runs out, you can hold L and R to start a drumbeat to regain your Kong Bananza form.
Unleash some Charge Punches at the last few Concrete slabs to make it to the Kong Elder, and complete the Bananza tutorial.
As you appear before the Elder again, they’ll offer some advice on how to get home: You’ll need to dive deeper still to reach the Planet Core, where legend says your wildest wishes can be granted. Sounds like a plan!
After you finish speaking to the Kong Elder, a door among all the shipping containers behind them will open, allowing a new path forward.
You’re still free to keep exploring the rest of Lagoon Layer now that the water is restored, and you can also head back to the Style Shop to see new clothing outfits to buy for Pauline!
Note that at any point in your adventure, you can return to the Kong Elder and speak with them to reset your Skills so you can put points into new areas as needed!
Before stepping into the shipping containers, consider moving along the outer edges of the containers to do a loop around.
In the far back right corner, you can find a Banandium Gem stashed away, and in the far back left corner, there’s an Anomalocaris Fossil.
Head inside, and you’ll find a small tunnel system full of Concrete walls, but no Boom Rocks. Luckily, there’s an ample supply of Gold, so give your Kong Bananza a whirl and start smashing your way through the walls of the shipping containers!
Don’t bother slowing your momentum – keep bashing through the Crockoids that stand in your path, and convert their golden skeleton insides into more Bananergy along with any ore veins you find.
Once you power your way up through all the concrete walls and blast through the Crockoids trying to block your progress, you’ll find a large interior room with another stake you can destroy to lead you down to Lagoon Layer’s final sublayer, and get another bunch of Banandium Gems!
You may notice that there’s a gap between Banana 40 and 51 in your collectibles list. You can expect certain Banandium Gems to only appear once you’ve beaten the game, so if you don’t see a number listed, don’t worry about trying to find it!
Chimpy Channel (Sublayer 102)
This final sublayer is a lot shorter and simpler than the others. Still, there’s a couple of things worth checking out.
In the room beyond where you get your Banandium Gems, you’ll find another Ruin Entrance on the left, featuring the likeness of your Kong Bananza. This means the Challenge Room inside can only be entered while powered up, and will test your Kong Bananza abilities with the chance to earn 3 more Bananas!
Once you’re done in the Ruins Challenge Room, be sure to punch a hole through the wall opposite the Ruins to find a ledge outside with the final Banandium Gem in this sublayer, hiding behind a broken boat.
Head out the main exit past the Ruins to find a large destroyed bridge that you’ll need to find a way across.
Climb up to the right carefully, using the green metal as a guide.
However, when you start climbing left along the moving concrete slabs, the space above will reveal hordes of little Peekaboopoids that you’ll need to quickly move away from or punch upwards to get rid of!
At last you’ll be able to reach the Chimpy Channel Exit, where the stolen bananas have been hoarded. Standing among them are the ones responsible for turning Pauline into a rock: the president of Void Co., Void Kong.
After Pauline refuses to join Void Kong, they’ll trigger their strange digging device to burrow further toward the Planet Core, while one of Void Kong’s lackeys stays behind to deal with you. Grumpy Kong will summon a horde of Peekaboopoids to congeal around a strange device, forming a giant boss!
This boss may seem imposing at first, until you remember that DK has the power of the Kong Bananza on their side now.
The Peekabruiser’s main form of attacks largely comes from spitting out endless streams of little Peekaboopoids to chase and harass you, while also charging forth while encased in concrete to ram into you.
Punch away anything that gets close, and wait until you see Peekabruiser charge at you with a dash. Run to the side, and it will whizz past before falling over and stunning itself.
This is your moment to trigger the Kong Bananza, where you can use your increased punching power to start blasting holes in the boss with as many punches as you can dish out. With a big enough hit, the concrete will shatter, rendering the boss vulnerable to follow up hits.
At this point, you’ll need to quickly chase down and smash the boss as quickly as possible. With its outer shell gone, it doesn’t matter if you’re in Bananza form or not, though the form can be quite useful for using Charged Smashes to knock away hordes of enemies.
After taking a bit of damage, be ready for the Peekabruiser to fly away and start summoning more little Peekaboopoids to return to its body. Doing so will heal it slightly, but also give you a chance to catch up and smash into it before it can heal away your damage.
When it’s very low on health, it will try to escape by building a giant sand mound to get away from you, calling out for its Peekaboopoid brethren to replenish it.
Quickly climb up the mound and give it your best punches to stop the boss in its tracks, and send Peekabruiser packing.
The boss will leave behind a large stake, which you can destroy like the others to open up a Sinkhole down to the next major layer. A 5-bunch of Banandium Gems will also appear and drop down to give you a tasty treat upon arrival!
Before leaving however, be sure to take the chance to spend any last fossils at the Style Shop that opens up here, or use the Teeleport to return and gather more Banandium Gems or Fossils if you’d like (you’ll be able to return here before too long). You can also talk to Grumpy Kong (who is done fighting for the moment).
Otherwise, once you’re ready, dive down into the Sinkhole to reach the next stop on your trip to the Planet Core: The Hilltop Layer!