
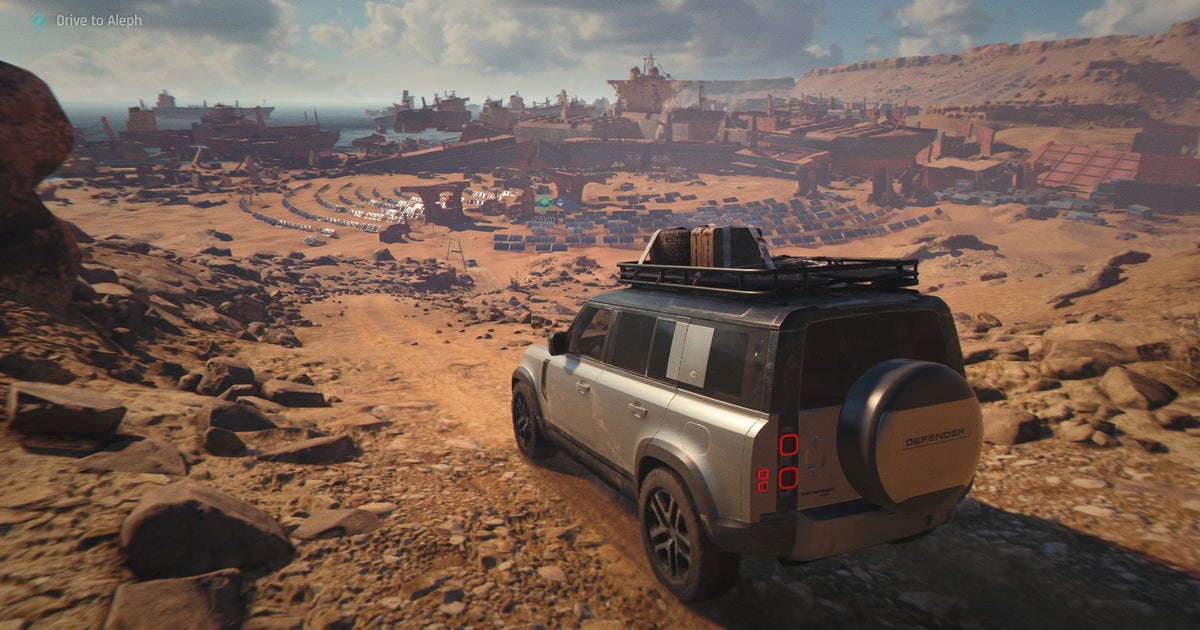
After having an explosive time in Slovakia during your last mission, Mission 4 – The Past Never Dies in 007 First Light takes you to the hot, sandy area of Aleph. Here, you’ll be coming face to face with the intimidating Bawma and trying to get closer to wherever rogue MI6 agent 009 has run off to.
Below, I’ve put together a 007 First Light Mission 4 walkthrough to help you with paying the auction fee, finding 009, and escaping Aleph with your life intact.
To see this content please enable targeting cookies.
Manage cookie settings
Need more help working for His Majesty’s Secret Service? Well our 007 First Light walkthrough is here to help.
007 First Light Mission 4 – The Past Never Dies walkthrough
Bond’s next mission – alongside Greenway – is to head to Aleph in continued pursuit of 009 and track him down. Just like the last mission, this one begins with you getting yourself a Land Rover and driving to Aleph.
Image credit: IO Interactive/Eurogamer
Upon arriving in Aleph, start the assignment by following Greenway. Soon enough though, you’ll lose sight of him and need to find him again.
1. Find and reach Greenway
After bumping into the stranger, head left towards the brute guarding the gate and you’ll see Greenway on the other side (shown below).
Image credit: IO Interactive/Eurogamer
To reach him, you’re going to need to go right past the merchants and then left past the men watching television. As you do that though, the men really won’t appreciate you interrupting their screen time and will start a fight. Quickly fend them off.
Image credit: IO Interactive/Eurogamer
Once the fight has been dealt with, keep following Greenway. In just a moment, you’ll finally lay your eyes on Bawma; the prolific pirate who supposedly has ties to 009.
Continue to follow Greenway after the cutscene until you’re prompted to talk to Bawma’s men. I chose to enquire with the men about auction entry (‘that’s right’), which requires a ticket and 100k that Bond clearly does not have.
Image credit: IO Interactive/Eurogamer
2. Obtain 100k auction fee
Speak with Greenway next, who suggests he seek out an invite to the auction while you try to get your hands on 100k of cash.
Start by going to the blue container that’s to the right of Greenway and down the stairs, then use your Q-Lens to look for clues and opportunities.
You should see one blue opportunity with your Q-Lens while going down the stairs, and this is Nirmala. Speak to her and ask her about ‘opportunities in the market’ and ‘anything I can do for you?’.
Image credit: IO Interactive/Eurogamer
This conversation lands you two hints:
Nirmala’s lost jewel – Aadan operates a cup game to the right of the fight pit where you can win Nirmala’s jewel back. She promises to make it worth your while.
Buyer carrying crypto – Last seen near electronics stalls through the circular tunnel.
This also opens up the Jewel of Jahari opportunity for us, but we can’t do much with that just yet. To try your hand at winning the Jewel of Jahari, you need to pay $3,500 to Aadan which you won’t have right now, so we’re going to seek out some more hints first.
From Nirmala, head right through the market towards the electronic stalls. There’ll be an opportunity to eavesdrop on the buyer carrying crypto here while he’s on the phone.
Image credit: IO Interactive/Eurogamer
After the call, hack the buyer’s phone and follow him to maintain the signal (just like you did with Pike during Mission 2). This now opens up a new opportunity: ‘the crypto wallet’.
3. Steal the crypto wallet
While following the buyer, he’ll enter a stall guarded by a soldier who won’t allow you to enter. First, face the guard and U-turn, then interact with the poster on the wall here. This unlocks a hint about the shooting range for us: ‘Basim runs a shooting range in the market’s weapons districts’. This might come in handy later!
Image credit: IO Interactive/Eurogamer
With that out of the way, use your Q-Lens to hack the fan inside of the stall (behind the guard), then wander inside the stall to resume hacking the buyer’s phone.
Image credit: IO Interactive/Eurogamer
Moneypenny will now be able to track the location of whoever was calling the buyer, adding their location to your HUD. Go and locate the caller next.
Once you approach the caller, scan the area with your Q-Lens and you’ll find that she is holding the crypto wallet, which you’re now tasked with stealing from her.
Image credit: IO Interactive/Eurogamer
To the left of the coffee stall that the caller is at, you can find a lighter atop a crate (shown below). Pick it up.
Image credit: IO Interactive/Eurogamer
Next, use the lighter to set the barrel beside the coffee stall alight. This will distract the caller, allowing you to pickpocket the crypto wallet from her.
Moneypenny will now advise that you get as close to the Aleph cell tower as possible to be able to hack the crypto wallet. Follow the new objective marker on your HUD.
Atop the stairs leading to the cell tower, you’ll be trespassing, so you’ll want to avoid (or takedown) any guards along the way. Upon entering the restricted area, multiple men are ahead of you, while one is in the room to your left.
You can perform an easy takedown on the lone guard in the room, and grab some electrical components from here if need be.
Image credit: IO Interactive/Eurogamer
As for the guards up ahead, you can turn on the radio by the room’s exit to distract the closest one. As he approaches, you can quietly perform a takedown on him too.
Up ahead, there’s three more men. I used a Smoke Pod to distract them and reduce their visibility then quickly performed takedowns on each of them to clear them out. There’s also lots of items to hack in this area alternatively, as well as plenty of electricals to loot to help with that.
Go past the room where the three men were and continue up the stairs of the cell tower, where there are more guards. Here, I crouched behind the sofa and used a Lure to get the attention of the guard fixing the pipes. Once he was following me down the stairs, I proceeded to take him down without garnering any unwanted attention.
Next, I hacked the SARS radio on the table to get the attention of a second guard, then took them down too.
Image credit: IO Interactive/Eurogamer
At this point, there was just one guard left on this floor, so I simply went over and punched him. Problem solved. There’s different ways you can go about clearing out the men depending on what gadgets you have available though; you could use the Dart Phone here or Smoke Pods, or hack more items.
Proceed upstairs and you’ll now have eyes on the cell tower but of course, there’s more guards here. Climb across the ledge just up ahead while avoiding their view.
Image credit: IO Interactive/Eurogamer
There’s just two men in the second half of this floor, and thanks to all the chemicals I had left over, I used two Flash Mines to knock them out with ease. You could again simply fight them or use the Dart Phone or other tech here.
Continue through the green door the two men were standing by, then climb up the blue pipe just ahead.
Image credit: IO Interactive/Eurogamer
There’s a barrier you’ll need to destroy up ahead but prepare yourself; there’s also a brute to fight just behind it and these guys are tougher than your average soldier. Still, they’re nothing on the twins from Mission 3, so you’ll be alright.
After defeating the brute, keep heading towards the cell tower and interact with it.
Image credit: IO Interactive/Eurogamer
Moneypenny will disable the password for the crypto wallet and you’ll now have bagged yourself 50k. Just another 50k to go!
Up next, we’re going to check out Basim’s shooting range next to see if we can win a prize there. After that, we’ll finally see what Aadan’s cup game is all about.
4. Check out Basim’s shooting range
Exit the cell tower and return to the markets, where you’ll have a brief rendezvous with Greenway. Conveniently, Basim’s shooting range is just past Greenway, to the left.
Speak to Basim and pay him $3,000 to take part in the shooting range challenge. Here, you need to shoot all ten of the targets to be in with the chance of winning a cash prize, and it’s easily done.
Image credit: IO Interactive/Eurogamer
Upon beating the shooting range challenge, Basim will hesitantly hand over a 30k cash prize. Now, we need to track down another 23k. Or if you messed up your first attempt like I did, you may need to track down a little more than that…
If you U-turn from Basim and head straight past the gun merchants and through the orange container, a pirate will beckon you over. Talk to him to learn about the fight pit, a place where we can go and make some more money.
Image credit: IO Interactive/Eurogamer
Before we get our hands too dirty, let’s quickly entertain Aadan and see if we can win the Jewel of Jahari back. Track the ‘Jewel of Jahari’ opportunity in your Objectives menu to mark Aadan’s location on your HUD, then head over there.
5. Win back the Jewel of Jahari
Hand over $3,500 to Aadan to play his cup game. Here, you need to try and guess which cup the Jewel of Jahari is beneath.
Image credit: IO Interactive/Eurogamer
Now, there’s actually a little trick to guaranteeing we win the jewel and that’s the Q-Lens. Once Aadan finishes shuffling the cups, scan them with your Q-Lens to immediately reveal which cup contains the jewel.
In my experience, the jewel was in the middle cup.
Image credit: IO Interactive/Eurogamer
With the jewel in hand, return to Nirmala and hand it over to her. She’ll give you 30k for your efforts.
Now, if you didn’t mess up both your first attempt at the shooting range and cup game as I did, you’ll now have 100k plus some to spare. If not, you’ve two more ways of making some quick cash: distract and pickpocket any guards with wallets (which you can spot with your Q-Lens), or take part in the fight pit that the pirate told you about earlier.
If you need more cash and fancy joining the fight pit, keep on reading. If you instead have enough cash to continue to the auction, skip to my section on ‘Pay the auction fee’.
6. Join the fight pit
Enter the fight pit, which is directly behind the Pirate who told you about it earlier. Upstairs, eavesdrop on the ringmaster and then speak to him afterwards.
Image credit: IO Interactive/Eurogamer
The ringmaster will advise that you speak to Yasin at the bar, which is conveniently just behind you.
Image credit: IO Interactive/Eurogamer
To secure a place in the ring, you first need to defeat one of Yasin’s fighters, Omar. Once you defeat Omar (which is no problem at all), begin following Yasin. You’ll be invited into the ring to fight three different fighters. First, there’s Yahya, then there’s duo, the Jnoun, and finally, there’s the Hammer.
You’ll have done enough fighting at this point that as long as you parry their attacks and enact plenty of grab attacks when they’re blocking, you’ll make light work of these fights.
Don’t forget you can use gadgets to your advantage here too, as well as the bottles around the pit. I fear most fighting rings wouldn’t allow smoke mines but it appears anything goes in this fight pit.
Image credit: IO Interactive/Eurogamer
After completing all three fights, speak to Yasin to be awarded your winnings: 60k in cash. Sweet!
We’re sadly not done with the fight pit just yet however. Upon leaving, three fighters – unhappy that you’ve lost them a lot of money – will start to fight you. Show them who’s boss (and throw them into the electrical grid here to make light work of them).
7. Pay auction fee
With plenty of cash collected, make your way to the auction entrance and pay the auction fee. Then, continue following Greenway into the auction and sit down.
Image credit: IO Interactive/Eurogamer
8. Win the auction
Soon enough, you’ll be asked to complete a polygraph before the auction can begin. Tell the auction attendees to ‘Call me James’ when prompted.
You’ll also then be asked to place an opening bid. You can select any option here.
As bidding continues, Greenway will suggest you sabotage the next offer. You can do this by hacking the polygraph machine that the bidder is using (shown below).
Image credit: IO Interactive/Eurogamer
It’ll now be your turn to make an offer. Tell the group whichever option you wish, but I chose ‘Remove Scorpius from Aleph.’ A good offer, but this only raises the stakes among the other bidders.
Image credit: IO Interactive/Eurogamer
When prompted by Greenway that time is running out, choose to ‘Improvise’. Bond will now offer three decades of MI6 intel to the auctioneer… whether that’s a wise decision, I’m not sure.
This sees you winning the auction, but Greenway is certainly not happy that you’ll have put his life on the line for it. You’ll now finally be able to talk directly to Barkhad Ali.
Image credit: IO Interactive/Eurogamer
In a tense confrontation, Ali agrees to help you with taking down Bawma in exchange for his own shot at becoming Pirate King.
9. Get to the crane
Once the cutscene concludes, follow Ali. You’ll then be told to make your way to the crane on foot while Greenway goes with Ali via boat. Go along the zipline just up ahead to start your journey through the port.
Image credit: IO Interactive/Eurogamer
The route here is quite linear but as you progress, it becomes very heavily guarded. You’ll want to try to clear out what guards you can while advancing through the port so as to not raise the alarm to Bawma on what you’re up to.
After the first bulkhead door, you’ll be directed to a second one, but there’ll be two guards along the way. These two are easily taken care of using a single Flash Mine; wait for the guards to be standing beside one another then throw a Flash Mine at one and voila. Alternatively, you can take care of them by making the palettes above fall on top of them.
Image credit: IO Interactive/Eurogamer
With these two guards taken care of, jump down and collect one of their guns (just in case), then start heading towards the left so that you’re on the exterior of the port. There should be some blue platforms up ahead and another guard.
Image credit: IO Interactive/Eurogamer
Jump across the platform and when the guard is facing the ocean, throw the can to your right at him. This knocks him off the port and takes care of him quickly, but be careful as there are five more guards in the area.
Next, hack the generator to your right to get the attention of the guards. As one of them comes to investigate, you can either use a Smoke Pod on the dust pile here as he walks over it (then take him down), or use a Flash Mine on him to eliminate him altogether. I did the latter because using Flash Mines will simply never get old.
Image credit: IO Interactive/Eurogamer
Doing either of the above options is likely to attract the attention of more guards. As another guard approached the above body and started investigating, I performed a takedown and quickly retreated.
This, again, caused more guards to investigate what was going on. Before long, all three remaining guards in this area were investigating, allowing me to slip past them to the next bulkhead door.
Image credit: IO Interactive/Eurogamer
You could also fight the guards outright but I don’t recommend this; they’re heavily armed and this portion of the mission is much easier when going unnoticed.
In the following area, keep left and keep behind cover wherever possible. There’ll be two guards below you just up ahead; use a Flash Mine on one of them to quickly eliminate the pair.
Image credit: IO Interactive/Eurogamer
Another guard will come to investigate but don’t worry about them. Climb along the ledges to your left until you’re able to drop down.
Upon dropping down, head right then left to see a guard standing by a fire hydrant. Slowly approach him and perform a takedown.
Image credit: IO Interactive/Eurogamer
Kick the gate beside the downed guard open and continue forward. You’ll find a weapon crate to loot here if you fancy.
Continue forwards where there’s a small kitchen area with a speaker and multiple guards (shown below).
Image credit: IO Interactive/Eurogamer
If you’re low on supplies, there’s plenty in this area to grab provided you can distract or avoid the guards. If not, continue to your right where there are some chemicals as well as a man on the phone by a large TV screen.
Distract the man and simultaneously electrocute a nearby guard by hacking the wind fan behind him (shown below). Then, creep over to the man and perform a takedown.
Image credit: IO Interactive/Eurogamer
It’s likely that more guards will come to investigate. Hang off the ledge here, out of their sight, until they’re done.
Image credit: IO Interactive/Eurogamer
Once it’s safe, climb up from the ledge then U-turn and jump onto the platform in front of you to continue.
Image credit: IO Interactive/Eurogamer
Press forward while continuing to avoid the sight of the guards, then head right. Here, there’s a topless guard smoking and another guard standing beside a fire hydrant.
Wait for them to stand beside one another and then throw a Flash Mine at one of them to quickly eliminate them.
Image credit: IO Interactive/Eurogamer
With the fire hydrant on your left, go straight ahead and left. There’ll be supplies along the way. You’ll soon arrive at a room with two exits; one of them is a locked gate that’ll attract the attention of guards if destroyed, while the other has a security camera.
You can actually hack the security camera, allowing you to safely go past without being spotted. Do that.
Press forward and upstairs towards your quest marker and you’ll find three more guards in front of the bulkhead door we need to enter. Fortunately, there’s lots of opportunities to distract them here, including a wind fan, stereo, and generator.
Image credit: IO Interactive/Eurogamer
Of course, there’s also ol’ trusty Flash Mines you can use here to make light work of the situation.
I personally distracted the guard closest to the door by hacking the stereo and then performing a takedown on him as he approached. Once the second guard approached to investigate, I snuck over and performed a takedown on him as well before going through the bulkhead door.
Image credit: IO Interactive/Eurogamer
You’ll have now finally reached the crane, but we’re obviously not done here just yet.
10. Reach 009’s boat
Now, you need to reach 009’s boat.
Climb along the ledges to your left and follow the path ahead; it’s linear and unguarded so you’re in the clear for now. Once you board the boat however, prepare for trouble.
Image credit: IO Interactive/Eurogamer
11. Find 009 on his boat
Once on 009’s boat, you’ll encounter your first booby trap. Keep your eyes peeled for these going forward and be sure to disarm any that you come across.
Image credit: IO Interactive/Eurogamer
The second booby trap cannot be disarmed from where you’ll approach it. Instead, you’ll need to climb along the edge of the boat to reach the other side of the trap.
Image credit: IO Interactive/Eurogamer
Disarm the traps up ahead (though some of them cannot be reached yet) then head up the staircase on the right-hand side of the boat. Take caution of even more traps as you do.
Image credit: IO Interactive/Eurogamer
Upstairs, you want to be very careful of hidden laser traps. These are revealed by hidden particles in the air according to Greenway, so turn on the sprinkler system just in front of you to see how that works.
Image credit: IO Interactive/Eurogamer
To your left, a laser trap is revealed by the sprinkler system. Fortunately, you can crouch beneath this one to reach a second set of sprinklers you can turn on.
It’s also worth noting that you can identify laser traps without sprinklers if you keep a careful eye on walls and plantpots. Laser traps are indicated by small black holes in these items that appear unnatural.
This reveals more traps that you can’t directly pass, but they do help you visibly see which route around the boat you can take.
Vault over the flowerbed that the second set of sprinklers is attached to. There’s another laser to your right that we must avoid; you can go past it by hanging off the boat ledge to the left of it.
Image credit: IO Interactive/Eurogamer
Once safely past the laser, turn on the third set of sprinklers to reveal another laser that is continually moving upwards and downwards. Crouch past it when it is pointing upwards.
Image credit: IO Interactive/Eurogamer
Once past this laser, keep right to see another moving laser above a flowerbed. Wait until this laser is pointing left and then vault over the flowerbed. Just ahead, there’s more sprinklers to turn on.
Image credit: IO Interactive/Eurogamer
There’s yet another moving laser to go past but this time, there’s two of them. Wait until there’s enough space beneath both of them and crawl through.
Image credit: IO Interactive/Eurogamer
You’ll now be able to enter the boat’s interior with Greenway, but you’ll unfortunately find yourself amidst a crime scene: 009’s corpse is at the center of it.
12. Investigate the crime scene
Before continuing, you need to examine the crime scene for clues. Use your Q-Lens to quickly identify them.
If you’ve any trouble, here are all clues that can be found here:
Diamonds – on the coffee table beside 009’s body.
Newspaper – on the kitchen counter beside the stand mixer.
Blueprints of the Grand Carpathian Hotel – on the dining table.
Bomb Materials – on the table directly across from the dining table.
Photo of Greenway, photo of MI6 HQ, MI6 blueprints, photo of M, frame marks, photo of recruits, photo of Bond, photo of MI6 apartment – all found scattered across 009’s office.
After interacting with all of the above clues, Greenway will point out a photograph of both him and 009 on the floor. Flip it over to view the Transworld symbol on the back.
Next, interact with the Spyglass beside the bomb materials and try to find the Transworld symbol in the surrounding environment.
Image credit: IO Interactive/Eurogamer
13. Wake Greenway
Before long, you’ll wake up hanging above a crocodile pit alongside an unconscious Greenway and Bawma, who’s less than happy to see you both.
When prompted, bargain with Bawma, then try to wake Greenway. These attempts are futile and Bawma will continue to lower you anyway.
Image credit: IO Interactive/Eurogamer
Swing back and forth once prompted to finally wake up Greenway, who fortunately knows exactly what to say to save both of your lives: Harmony. This is Bawma’s missing sister, and Greenway claims you know where she is.
14. Leave Aleph and head to the Transworld Wreck
Temporarily safe again, begin following Bawma after the cutscene, then get into the Land Rover and begin driving towards the Transworld Wreck.
Image credit: IO Interactive/Eurogamer
As you exit Aleph, you’ll see the title card for Mission 5 – Beyond the Grave, but your work here with Mission 4 – The Past Never Dies is not done. Think of Mission 5 as Part 2 of The Past Never Dies, and an unplanned detour during your time in Mauritania.
The rest of 007 First Light continues with our Mission 5 – Beyond the Grave (The Past Never Dies Part 2) walkthrough.